It is understandable that if you have only used Windows your entire life and never had a chance to use Linux that you may be concerned about moving all of your documents over to Linux Mint. Even if you are interested in learning more about Linux, you might want to try it before you take the plunge. Finally, it is useful to learn a simple and easy way to test various operating systems. Therefore, in this section, we will show you how to install Linux Mint Cinnamon and Linux Mint Mate into virtual machines on your current computer - regardless of whether your current computer is a Windows, Apple or Linux computer. The entire process is free, quick and easy.
There is another reason to learn about Virtual Machines. Linux Mint just came out with Mint 18.3 which has many new features. We can check out how 18.3 Cinnamon and 18.3 Mate work by creating Virtual Machines for each for them. This is a great way to test and/or compare any new or existing operating systems you are thinking about installing on your computer. It is basically taking the operating systems for a test drive.
Mint 18.3 Cinnamon and Mate are available to download on this page: https://www.linuxmint.com/download.php
Click on and download the 64 bit versions of Cinnamon and Mate. These are called ISO files and they will take a while to download.
Install Virtual Box from the Mint Software Center
If you have a Linux Mint computer already, you can quickly install Virtual Box from the Mint Software Center:
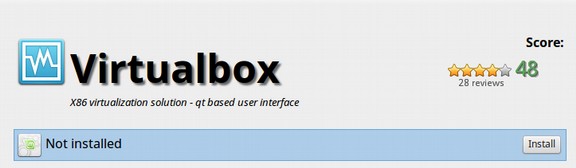
If you are still using a Windows or Apple computer, you can go to https://www.virtualbox.org/
Then download the version for your system and install it on your computer. Either way, once you have Virtual Box, click on it to open it.
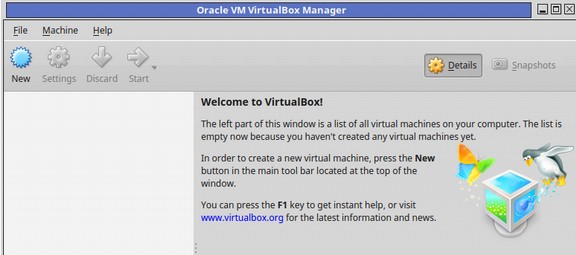
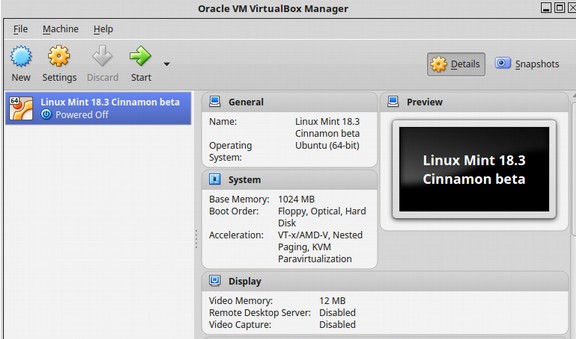
Click New. Then name the distribution: Linux Mint Cinnamon 18.3.
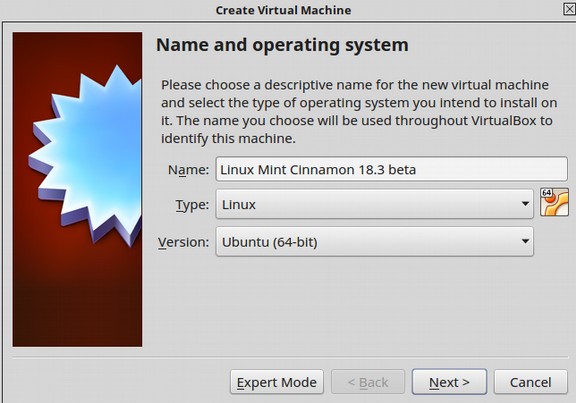
Then click Next. On the next screen, increase the memory to 1024 MB. Then click Next. The default settings on the Hard Disc screen are good. Click Create. Default setting of VDI on the Hard Disc File Type screen is also good. Click Next. Default setting of Dynamic on the Storage Physical Hard Drive screen is also good. Click Next.
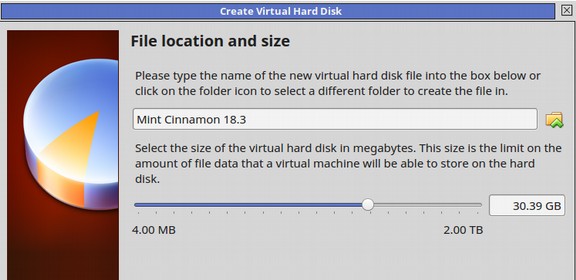
Increase Hard Drive Space to 30 GB, assuming you have this much extra space on your hard drive. Then click Create.
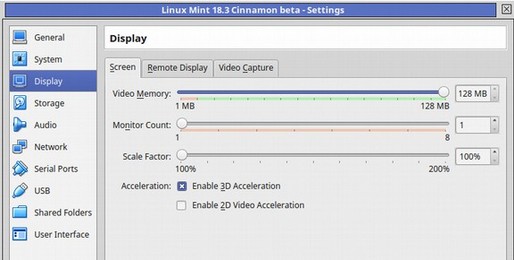
Before we start the virtual machine, we need to change some of the settings. Click on the yellow Settings wheel. Then click on the Display tab. Check the Enable 3d Acceleration box and increase the video memory to 128 MB.
Next click on General in the side menu. Then click on the Advanced tab. Change Shared Clipboard from Disabled to Bidirectional. Then click OK. Then click the Green Start Arrow.

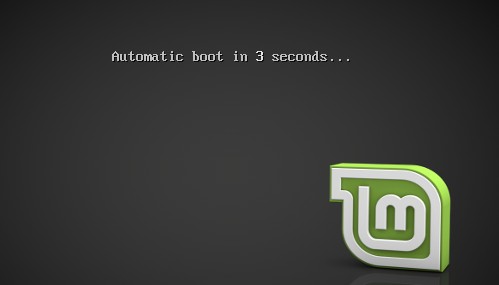
Click the Yellow folder on the right side of the screen. Then navigate to your Mint 18.3 beta iso file and click it to select it. Then click Start.
After a few minutes, the Mint Start screen will appear. The Start Screen will likely have a warning if installing Cinnamon (see image below). This warning may not appear if installing Mate. If the warning does not appear, then skip the next few steps and simply click on the Install Linux Mint icon.
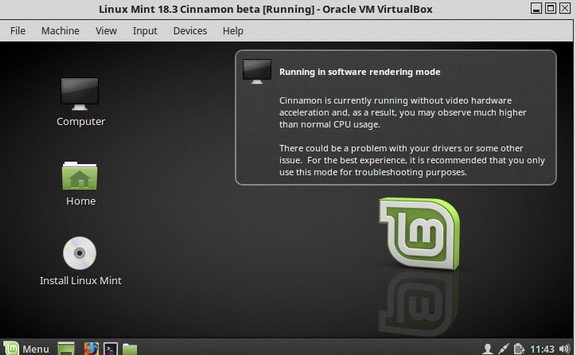
The warning says Cinnamon is running without video hardware acceleration even though it is. To fix this, first expand the window to make it twice as big by dragging out one of the corners. Then install Mint Cinnamon. Then after Mint Cinnamon has been installed, we will install Guest Additions (described later).
To install Cinnamon, click on the Install Linux Mint Silver disc.

The first screen is the language screen. Click Continue.

The next screen is the Third Party software screen. Check the box. Then click Continue.

The next screen is Install Type. Leave it set for Erase disc. Click Install Now. Then click Continue. The next screen is a Time Zone screen. Change it to your time zone and click Continue. Next is the Keyboard Layout screen. Leave it set for English US (or the country of your choice) and click Continue.
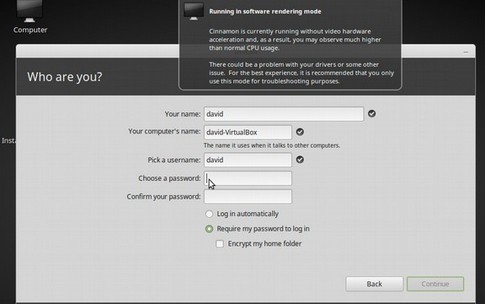
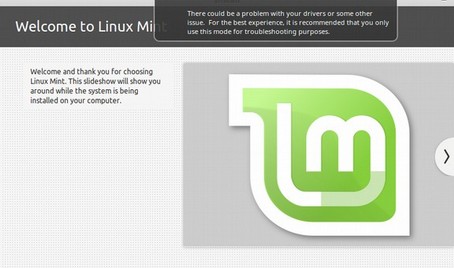
The next screen is Who Are You. Type in your first name and type in a password twice. Change log in to automatic. Then click Continue. This will bring up the Mint Slideshow which will show you several features about Mint while it is installing.
It will take several minutes to finish the install process. When it is done, it will bring up the Start screen:
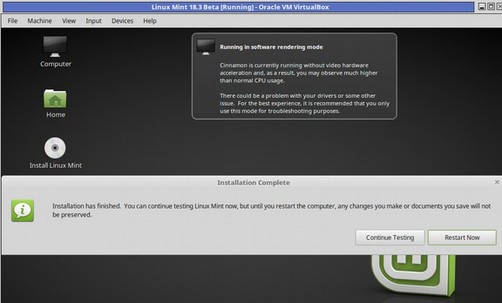
Click Restart. It will tell you to press Enter to remove the install file. Press Enter and wait for it to reload. The warning will still be there. The default Mint Cinnamon install doesn’t contain VirtualBox graphics drivers because it is moving target – every new version of VirtualBox requires new drivers.
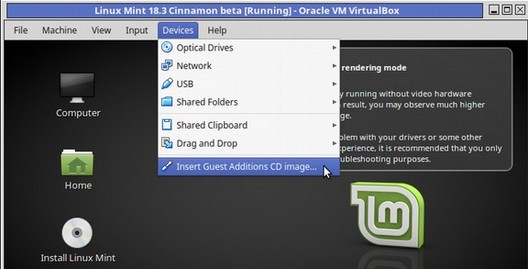
The Guest Additions package is needed for that. (Linux Mint Mate does not display this warning because it does not rely as much on Graphics as Mint Cinnamon). So click on “Devices” located in the top menu and choose “Insert Guest Additions CD image”.
Something like the following screen will appear.
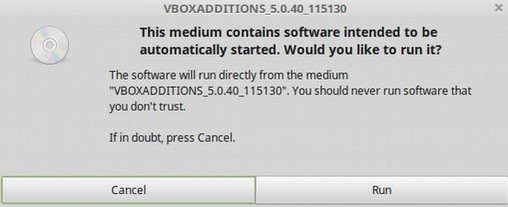
Click Run. Then Enter your password. This will bring up the terminal. Wait for the prompt. Then type yes and press Enter on your keyboard. It will take a couple minutes to install. It will end by saying Press Return to close this window. The warning may still be there even after installing Guest Additions. We need to restart Mint in order to remove the warning. Go to the Mint Menu in the lower left corner of your screen and click on the lower left black icon called Shut down. Then click Restart to restart Mint again. The warning will now be gone.
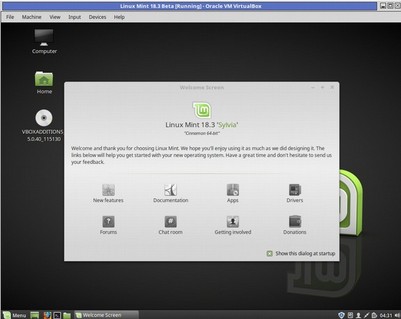
Close the Mint 18.3 Sylvia Welcome screen to get the Mint 18 screen. The silver VBOX Additions Drive will still be on the Desktop. Right click on it. Then click Eject. Here is the Desktop.
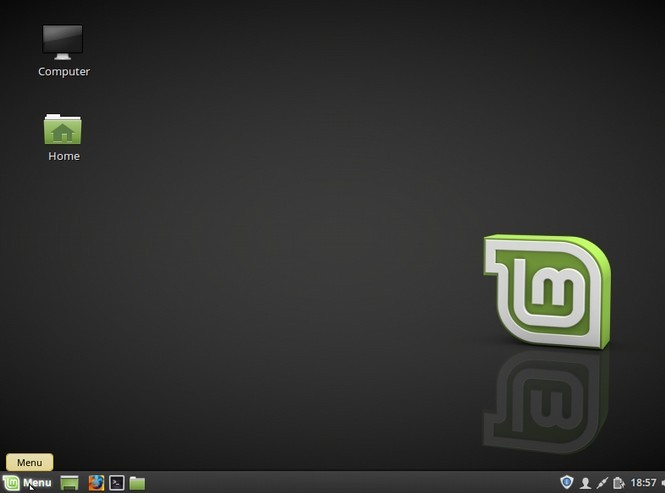
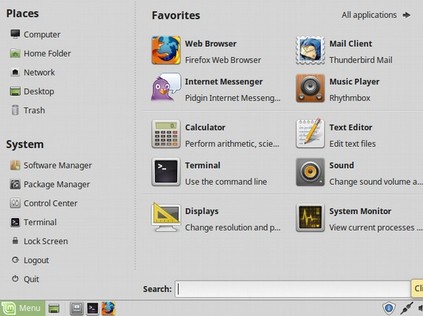
Note the Mint Menu in the lower left corner. Click on it to open it.
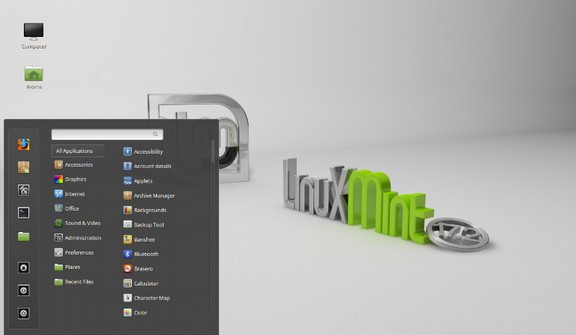
Here is the Desktop with the Mint Cinnamon menu open:
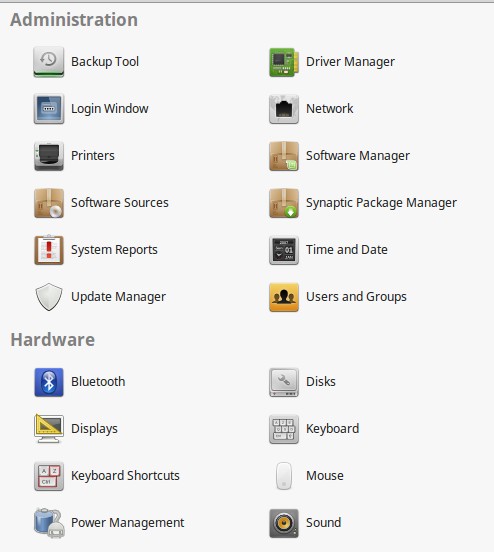
The first thing we need to do is keep the machine from going to sleep or locking up when we install the Updates. Click on Settings which is the third button from the top on the left side.
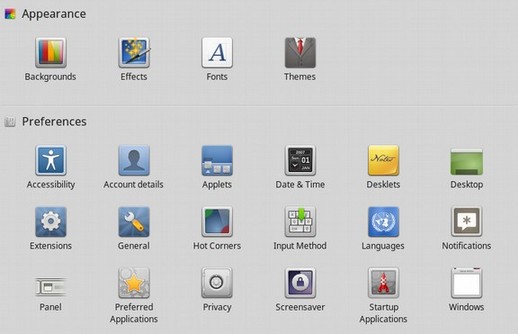
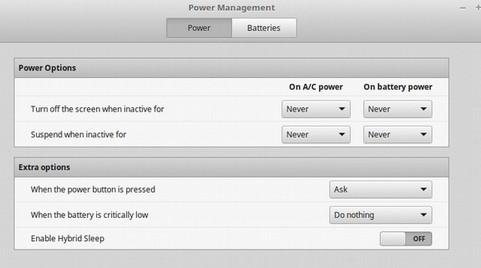
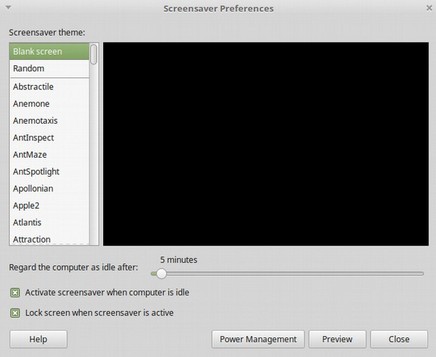
Click on the Screensaver. Chose a screen saver. Then click Settings. Delay before saver change to Never. Lock when put to sleep change from Yes to No. Then close the window. Then scroll down in Settings and click Power Management. Change to Never and No Hibernation:
Then close this window. Next we need to install updates. There is a small blue shield icon in the right side of the lower panel. Click on it. Use the default middle settings. Leave the setting at Let Me Review. Then click OK. The Update occurs in two stages. First update the Mint Updater. Click Install Updates.
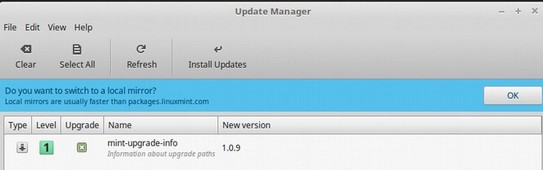
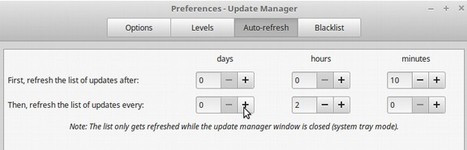
Then a bigger list of updates will appear. Click Select All. Then click Install Updates. This will take a while. To hide the Switch to Local Mirror question, go to Edit Preferences. Click Don't suggest Local Mirror. Click Apply. You can also change the refresh list rate to once every day instead of once every couple of hours.
Then close the Update Manager. Now turn off our Cinnamon Virtual Machine using the Mint Menu, Shut Down icon. Then repeat these steps to create a Virtual Machine for Linux Mint Mate 18.3.
Create a Virtual Machine for Linux Mint Mate 18.3\
This will be easier because there will be no warning screen and thus no need to install Guest Additions. Again, having both Cinnamon and Mate in virtual machines will allow us to compare their features and differences side by side. Installing a second virtual machine will also help us better remember the Mint Install process for when we want to install Mint on our real home computer. After you install Mate, the Mate Start screen will look much like the Cinnamon Start screen:
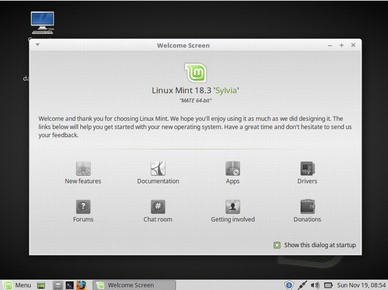
The Welcome screen includes links to the Mint Forum. If you haven't visited the Mint Forum before, you should. This is a great place to get answers to common questions. For now, uncheck the box “Show this dialog at Startup.” Then close the Welcome screen.
Just as we did for Cinnamon, our first step will be to reset the screen saver to keep our computer from going into lock down mode so quickly. To do this, open the Mate menu in the lower left corner of your screen.
Then click Control Center.
Scroll down to the Look and Feel section. Then click Screensaver.
By default, the screen saver is set to appear after only 5 minutes of inactivity which is pretty crazy. Move the dot to the right to change this setting to two hours. Uncheck Activate screensaver and uncheck Lock Screen. Add a screen saver by clicking on one of the theme options. Then click Power Management. Change Actions and Display to Sleep both to Never. Then click Close.
Now that we have the screen set, we can add our updates. Click on the Blue Shield in the lower right corner. Leave it at the middle setting and click OK. Click Select All. Then click Install Updates. When done installing updates, check on Edit Preferences in the Update Manager menu to hide local mirrors. Change Auto Refresh to Once per day. Then close the Update Manager. Then close Mint Mate by going to our Mate Menu and clicking on Quit, then Shutdown.
What’s Next?
We now have two brand new operating systems in virtual boxes. So far, they seem nearly identical. In the next section, we will review their differences to gain a better understanding of why we recommend Mint Cinnamon over Mint Mate.