Whether your computer has an old fashioned disc spinning drive or a more modern solid state drive, it is a fact that none of these drives will last forever. If you only use your computer a few hours a day to check social media, your computer hard drive may last ten years or more. But if you use your computer to do research and prepare documents and images for books and websites, and you keep your computer on 12 or more hours a day, seven days a week, your hard drive may only last four to five years. When it suddenly dies, you will be left with the black screen of death. This horrible event is most likely to occur right when you are wrapping up a major project that would have made you a million dollars – if only your computer had lasted a few days longer.
Even if you have a brand new computer, it does not take much of a security breach for some rogue program or email virus to crash your operating system. If your hard drive is OK, you can reinstall your operating system. But all of your documents may be wiped out. Having learned this lesson the hard way, many folks make a backup of their files – only to learn later, when they try to restore their files, that the backup was also corrupted! Or they only backed up their files once a year – thus losing 12 months worth of work when the backup was restored. Or they store the backup on an external drive that got roasted in a house fire. If you job depends on your computer, then it is time to take backing up your computer as a serious matter.
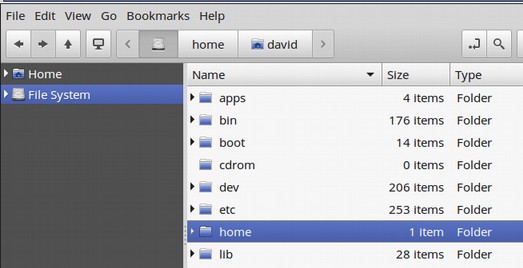
In this article, we will review how to make backups of our programs, settings and documents. These backups will allow us to quickly restore our programs, settings and documents in the event of a crash of our operating system or a failure of the hard drive inside of our computer. To better understand why we need more than one backup, let’s take a quick look at our Nemo File Manager.

When you open it, all you usually see are your documents – hopefully well organized inside of a series of folders. Click on File System and you will see all kinds of System files. These normally require Open as Root to modify.
Then go back to your home folder and click View, Show Hidden files. Then scroll down to see another huge list of hidden folders and hidden files. These all have a dot in front of their name.
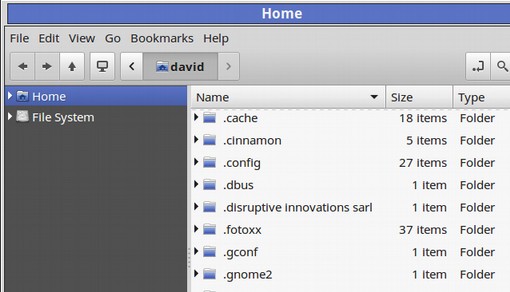
These are typically configuration files that hold all of our personal settings for browsers and other programs. Because we have three different sets of files, we need at least three different strategies for backing up and restoring them all.
Three Different Backup Strategies
We have three kinds of documents on our computer. These are programs, documents that do not change and documents that do change. Because we have three kinds of documents, we need three different backup strategies. Our personal documents that rarely change are easy. We can simply copy them periodically into an external USB drive and then use the USB drive to restore them. For our most active files, that we are working on and changing every day, we will set up a syncing folder set to an encrypted cloud service called Mega. They allow up to 50 GB for free and are the only fully encrypted cloud service. We will cover how to do this in a later section.
The harder part is backing up our Programs and System settings. Mint provides us with two methods to copy our programs and system settings. The first is an ongoing and syncing snapshot program called Timeshift. The second is the Mint Backup Tool. Unfortunately, the Mint Backup tool does not really back up all of our programs. And the Timeshift tool may not work in a new installation due to conflicts in the computer UUID numbers. In fact, most backup solutions have problems that only emerge when you try to restore your system using the backup program. The question we should ask ourselves is not what is the easiest or fastest tool to back up our system, but what is the most reliable way to restore our system if we need to rebuild it from scratch?
Historically, the answer has been to make a complete copy of your system with an image creation tool such as Clonzilla Live. Then use the ISO tool to restore your entire system. The problem with this approach is that there are a lot of complex steps in creating this clone. One wrong step and your Live Stick might be corrupted without you even knowing it until your restore process fails.
An easier more recent solution is to make snapshot copies of your system with a tool like Timeshift and then restart your operating system to apply the copy or snapshot. The problem here is that this only works if the operating system was not corrupted and the UUID number of your system has remained the same.
What we need is a simple and dependable solution that does not rely on complex imaging or a fully functioning operating system or even the same computer ID number. After having researched more than 20 different backup solutions, we will therefore recommend a simpler approach that takes a radically different path to the summit of a fully restored system.
We will break the Restore Process into five separate steps:
First, use a special tool called Aptik to copy all of our programs and system settings into a special backup archive. This file can then be stored on both an external USB and in the cloud. This is a very simple process that takes just a couple of clicks of our mouse and about ten minutes of our time.
Second, in the event of a complete hard drive and or operating system failure, use a Live Mint ISO Live USB to format our computer taking all the drive space just like we were installing Mint on a new computer. This is a simple and well traveled and reliable pathway.
Third, install Aptik onto our new system and transfer the backup programs archive to our new Nemo File Manager. Again, very simple. Very quick.
Fourth, direct Aptik to our backup folder and click Restore. Wait about ten minutes. Problem solved. All of our programs are not only reinstalled – a process than normally takes several days – but even better, all the customizations we have made to our programs are fully restored. As just one example, I typically make more than two dozen modifications to LibreOffice including adding special color palettes. Aptik is able to restore all these settings and files just the way I set them up.
Fifth, add back your documents and images from your USB storage and or Cloud Syncing system and we are off and rolling again. The entire process takes less than one hour and is extremely reliable. Welcome to the future of computer backups! Now that you have a better idea of why we recommend this new approach, let’s take a closer look at how to back up and store programs and settings with Aptik.
#1 Use Aptik to back up Your Programs and Settings
To install Aptik, simple open the Mint Software Manager. Then search for Aptil. Then click Apply. Alternately you can open a terminal and copy paste the following commands:
sudo apt-add-repository -y ppa:teejee2008/ppa
sudo apt-get update
sudo apt-get install aptik
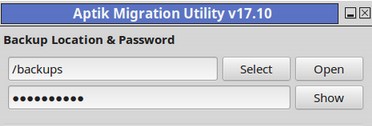
Then start Aptik from the Mint menu and enter your password.

First, we should create a backup folder in the file system folder of our computer. Right click on the screen and clicking Open as Root. Then right click again on Add a new folder. Then name it backup. Then in Aptik, click on Select which opens in the File System folder. Then click on our new backup folder.
Next, Click on One Click Settings to review the default settings (which we can change if we want).
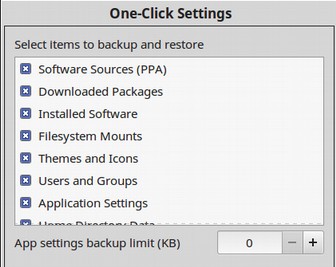
The two tasks not shown are Home Directory Data and Scheduled Tasks. Click OK to close this window. Next click on the Backup icon to the right of Installed Software. This will bring up a list of programs that will be backed up by clicking on Downloaded Packages. If some of your programs were installed as DEB packages, you may get this warning.
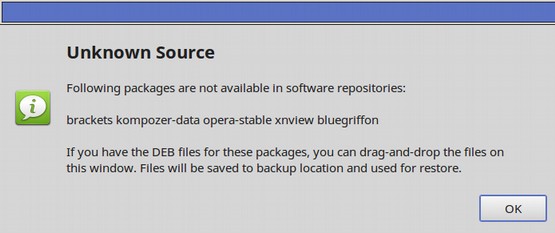
Open our file manager and open the Apps folder. Open as Root.
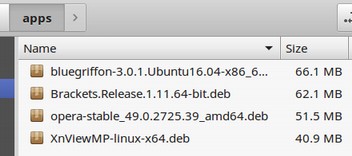
Then select and Drag all of these into the Backup list window and they will be installed along with the regular programs. Once we have moved all four programs over to the big window, we will see the following very long list of packages that will be copied and placed in a special archive folder. Here is the first half of this list:
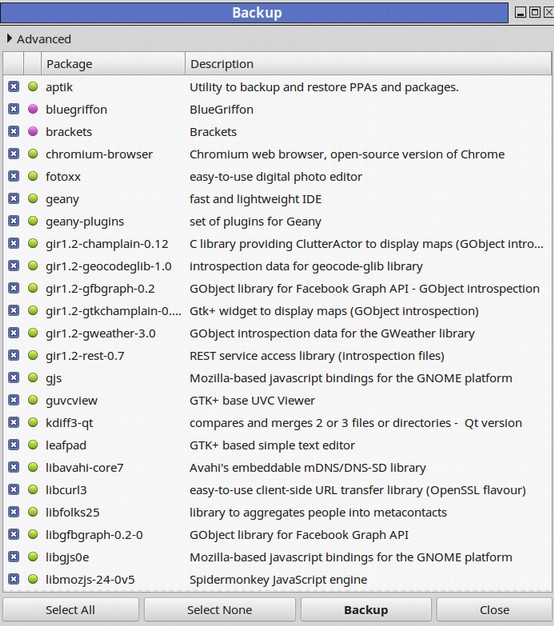
You can uncheck any programs you do not want to back up or copy to our new installation of Mint. Some very large programs – especially VirtualBox – should definitely be de-selected or even uninstalled before making your backup.
Programs that are a part of our Linux Mint distribution may not appear in this list. For example, Firefox is installed by default with Mint. Then click on the One Click Backup button. It will take about ten minutes to copy all of your programs, software sources and settings to your backup folder. The screen will end by stating “Backup completed.” Click Close. Now open the backups folder to see what is in it. There are 11 items.
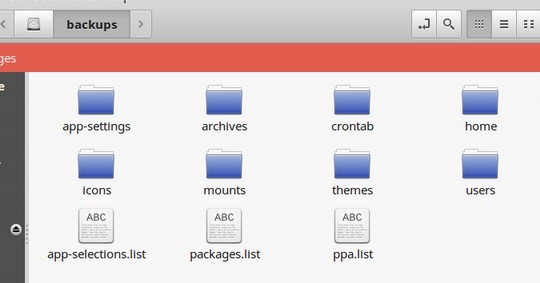
Right click on Properties to see the file size. It is 4.3 GB. We will then copy the backup to our USB External Drive and/or to our Cloud Storage Drive (which we will discuss more in the next section). Once you have copied the backup folder to an external or cloud drive, delete it from the Mint File System to save space.
#2 Use a Live Mint USB to restore your computer
You may even have the original Live Mint USB you used to install Mint on your computer in the first place. If not, format a USB stick and go to the Mint website to download the latest stable ISO of Mint. Then use Unetbootin to turn the Mint ISO into a Live Stick. Then restart your computer with the USB Live stick. Go through the normal installation process.
#3 Install Aptik on your New Mint Installation
When you are done installing Mint, remove the live stick and add Aptik by going to the Mint Software Manager and searching for Aptil. Then click Install. Alternately you can use the following commands to install Aptik on your new Mint installation:
sudo apt-add-repository -y ppa:teejee2008/ppa
sudo apt-get update
sudo apt-get install aptik
Then copy paste the Aptik backup folder from your USB or cloud storage to the File System folder in your new Mint installation.
#4 Point Aptik to your backup folder
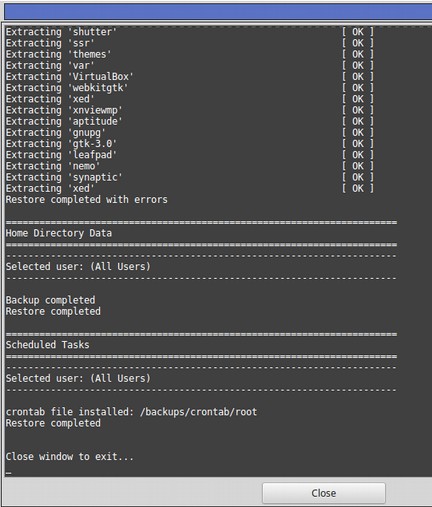
Then click on One Click Restore. When Do you want to continue comes up type in Y, then Enter. If an error warning appears, click Skip All to bypass it. Here is the final screen that will appear after a few minutes.
#5 Add Back your Documents and Images
Using the Documents backup we will discuss in greater detail in the next section, add these folders back from either your external USB drive or your Cloud Storage system. This process is amazingly fast but not entirely perfect. You may need to reinstall any applets you had in your side menu and any desklets you had on your Desktop. Also you should open each program on the new system to make sure it works. Some dependencies may not have been carried over and will need to be reinstalled. Even some programs such as Opera and Gnome web browsers may be missing and need to be reinstalled. Other programs, such as GUVCView may be listed in the Mint Menu but may not work. These will have to be uninstalled and reinstalled. An excellent way to see this system in action is to use Virtual Box to set up a new virtual Mint 18.3 system and then add Aptik and your backup folder to it through the Virtual Box Shared folder. Then click Restore. You will be amazed at how much this new virtual system will match your existing computer.
What’s Next?
Now that we have covered how to back up and restore our programs, in the next section, we will review how to back up our documents both with an external USB drive and with a cloud service.