One drawback of syncing folders is that you may inadvertently end up with a bunch of duplicate files. In this article, we will explain how to find and remove these unwanted documents. It is possible to compare and delete files simply by using two file managers which are open at the same time and then comparing the files and folder sizes and dates on files in each file manager in order to find and eliminate duplicate files and folders. However, this will not help you compare minor differences inside of two files. In this article, we will review how to use a free tool called Kdiff3 to find and remove duplicate files in Linux Mint. Kdiff3 is one of three free tools in the Linux Mint Software Center that uses a graphical interface to help you select, compare and remove duplicate files one by one. The other two are Fslint and Komparor. We will review Kdiff3 first because it is the most accurate tool. It can compare the differences between three files at a time and most important, it has the best documentation of the three tools.
There are also “command” line tools for deleting duplicate files in batches. Command line tools use computer coding commands that you type into a keyboard rather than a graphical interface where you click on buttons. Command line tools are therefore not really appropriate for the general public. In addition, command line tools often lead to false positives (duplicates that are not really duplicates). It is possible to accidentally delete important files with command line tools – and even crash your computer. We will therefore show you the slow and safe way to delete duplicate files from your computer. To download Kdiff3, go to the Mint Software Center and type kdff3 into the search box. There are two different versions of Kdiff3 listed. The smaller version kdiff3-QT does not have as many features as the full version. We will therefore install the full version.
KDiff3 is a file and directory (folder) difference and merging tool which can compare as many as three directories (or folders) at the same time (instead of two). Kdiff3 shows the differences line by line and character by character using customizable color coding. It does not merely compare file names or file sizes (which is what most other tools do). Kdiff3 provides an automatic merge function and has an editor to solve merging conflicts.
You can copy from any of the three file versions being compared and paste what you want into the merge result window. In addition to copying and pasting text, you can also select and drag text into a different window. Kdiif3 can also simulate merge operations, do synchronization and even produce backups.
In KDiff3, a merge need not be simply one file overwriting another. This makes Kdiff3 better than most merging programs. With other merging programs you have to choose between two files that each might have important edits. Whichever file you choose, you lose the changes on the other file. With KDiff3, you could get to keep the changes on both of the original files. Kdiff3 also has good documentation, which is available in several languages. To open Kdiff3, go to the Mint Menu, Applications, Programming and click on it to open it.
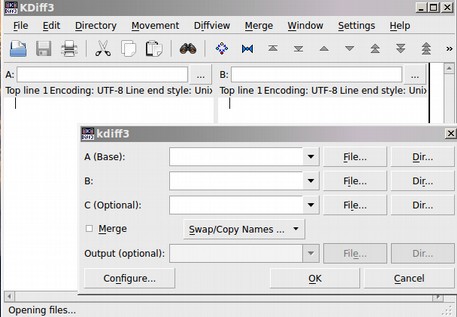
Comparison Targets Selection Screen (the smaller box shown above)
With the KDiff3 start screen, you can enter two (or three) directories to be compared – or two or three files to be compared simply by clicking on the File or DIR buttons – which will then browse to any file or directory (folder) in your File Manager. If for A a file is chosen, then a file comparison starts.
If for A a folder is chosen, then a directory comparison starts. If A selects a file, but B, C or the output selection is a directory, then Kdiff3 uses the file name for A in the specified directories.
If the Merge box is selected, then the Output becomes editable. But you do not need to give the Output a file name until you save the final merged file at the end of the comparison, merging and editing process.
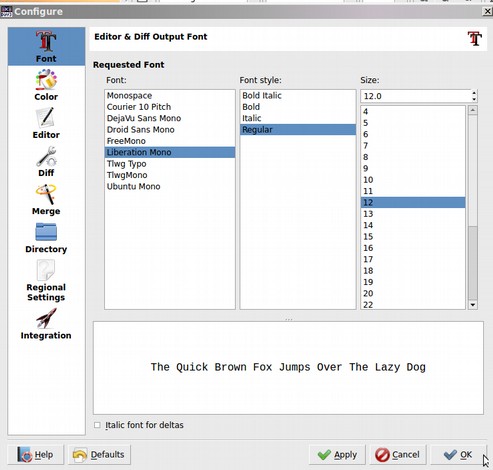
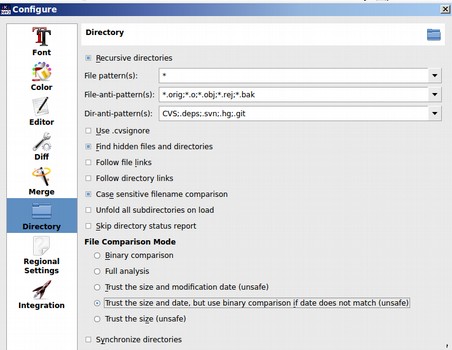
The Configuration button opens a dialog box where you can set options before running your comparison. The Configuration Options have seven tabs in a side menu. The first tab is fonts. We will set the default font for Liberation Mono Regular 12.
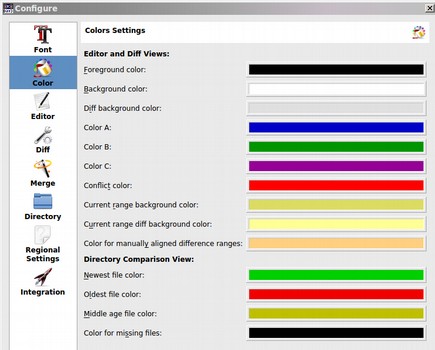
The Color Tab allows you to choose the colors for Options A, B, C, Conflict and several other differences. We will leave this tab set for the defaults
We will also leave the Differences tab and the other tabs set for the defaults.
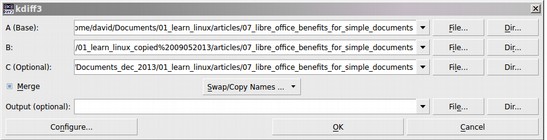
As an example, we will now compare and merge two files which are both called Chapter 1. We will have the newer file be Option A and the older file be Option B.
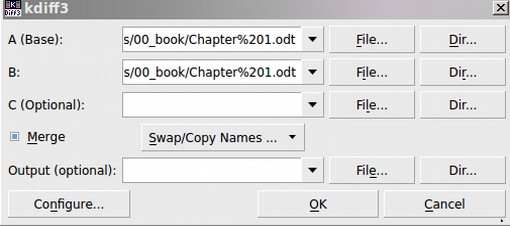
We will leave the Output box blank. Once both files are selected, click OK.
The input files are shown in the top row of the Editor screen with a white background which is split with Option A on the left and Option B on the right. The Output is shown with a yellow background in the second row.
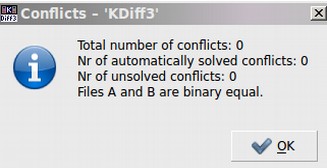
We now know that both files not only have the same file name and same file size (what we would learn from other programs) but we are assured that both files are absolutely identical. We can therefore delete the older file and keep the newer one. After clicking OK, the program warns us that some of the information in the file is not text but rather images. Linux Mint comes with different tools for comparing images. But for now, we will just compare text and assume that the images are the same.
When deleting files, you can have two versions of the file manager open at the same time to visually check that the names and file sizes match. However, a faster way to check several files that are in nearly identical folders is to let Kdiff3 compare the folders. Below are three nearly identical folders:
Click on Configure then click on Directory. Select the Option for Trust size and modification date, but use binary comparison if the date does not match. It warns us that this option is technically not safe. But it is good enough.
Then click OK and OK.
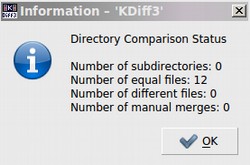
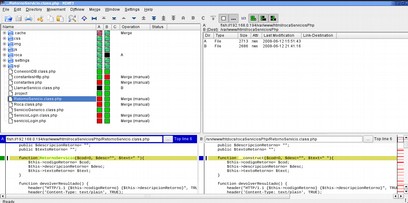
Since there are no differences, we can delete the entire older folders. At the very least, check Recursive Directories if you want to include subdirectories in the comparison, enter file patterns to show what files to include or avoid, and set the file-comparison mode (from binary, meaning the files are compared on a byte-per-byte basis, to “trust size,” which just checks whether the file sizes differ). Finally, select Synchronize Directories (why isn't this option checked by default?) so the directories will end up with the same contents after all comparisons. The results of the comparison are shown in a single display, with columns (A, B, and C) marking which files are in which directory. At the upper right, three graphic check boxes allow you to hide files that are the same (so you can concentrate on different files) or just show the new files on one of the directories. The Operation column shows you what needs be done to synchronize files. If you click on any file marked “Merge (manual),” you will get a line-by-line comparison of both files, showing which lines were added, deleted, or modified. It's up to you to do the merging or to decide which file should be the good one. (The Diffview menu entry allows you to configure the comparison view.)
If you right-click on the Operation column, you get an easy way to decide which operation should be done. When you're done selecting what is to be done, use the Directory menu entry to confirm your choices.
What’s Next?
Now that we now how to delete duplicate files, let’s look at how to use Mint Windows.