The many Windows ransomware cyber attacks caused a significant disruption to many MS Windows users, including large businesses and public services. Obviously, that disruption could have been avoided simply by switching from Windows to Linux. But the disruption could also have been avoided if computer users had adequately backed up their data so it could have been recovered safely – instead of being forced to pay a ransom and hope that the hackers would decrypt their now useless computers.
In the last section, we created a backup system for our programs. In this section, we will create two separate backup systems for our documents. First, we will review external USB options. Second, we will cover how to set up an encrypted syncing cloud service.
USB External Drive Options
The number of documents, images and videos you have as long as your future plans will determine whether you should get a small USB Thumb Drive or a bigger USB Hard Drive.
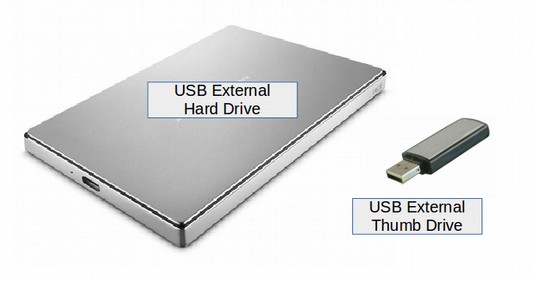
Thumb drives are now available up to 256 GB – which is more than most people will ever need – for as low as $60. However, if you have stored a lot of images and or videos or plan to store a lot of images and videos in the future, you may want to consider getting a full size USB hard drive as these can store up to 4,000 GB (4 Terabytes). Both Seagate and Western Digital offer 1 to 2 Terabyte models for about $100.
Either way, you should consider backing up your documents to your external drive at least once per month. Keep a couple of backups on your external drive and then delete older backups as you add newer backups.
Back Your Documents Up with an Encrypted Cloud Service
There is an obvious problem with storing monthly backups on an external USB drive. What happens if your computer goes down three weeks after the last backup? You will lose three weeks worth of work. This is why we also need a cloud syncing service that creates automatic daily backups of our most active document folders. There are many other benefits of using a cloud service – including being able to share large files. But the main reason we need a cloud service is to set up an ongoing document backup process. We will use Mega because they are the best encrypted cloud service. They also are integrated with Linux Mint Cinnamon.
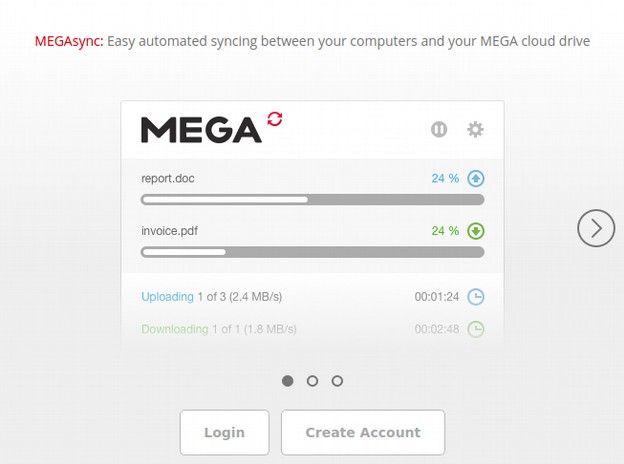
Mega provides free storage space of 50 GB and 10 GB of data transfer per month. Mega is also much more secure than Dropbox. Your data is encrypted end to end. This means that nobody can intercept your data while in Mega storage or in transit between your computer and the cloud. Mega also provides a public link sharing of files or folders, allowing you to collaborate and share you projects with friends and colleagues. Mega also provides a Sync tool so you can automatically update documents from your home computer to the Mega cloud drive. You can sync any folder from your computer to any folder in your Mega Drive. You can even sync any number of folders in parallel. MegaSync offers Live Encrypted Syncing. This means that you can access and work with your data securely across different locations and devices. It's always on and fully automatic.
Here are a couple of comments about cloud storage services:
“I use Dropbox, and something in it is vulnerable to virus as files started disappearing off my computer a few weeks ago.”
“Google Drive, SkyDrive and Dropbox? Why are we even still discussing these three? I may as well upload my data to the NSA directly. Client side encryption and non-US storage are minimum conditions to consider any cloud service.”
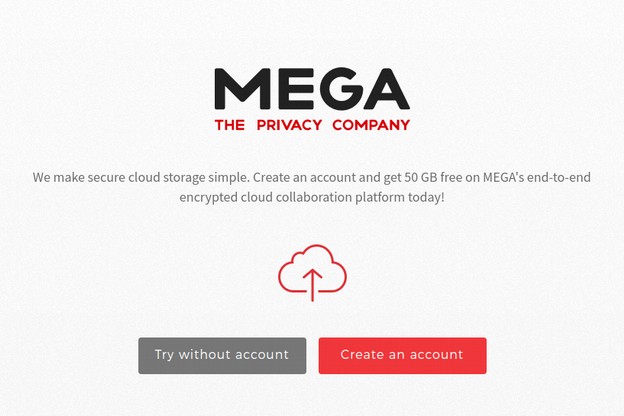
We agree. To get your free Mega account, go to the Mega.nz home page.
Then click Create an Account.
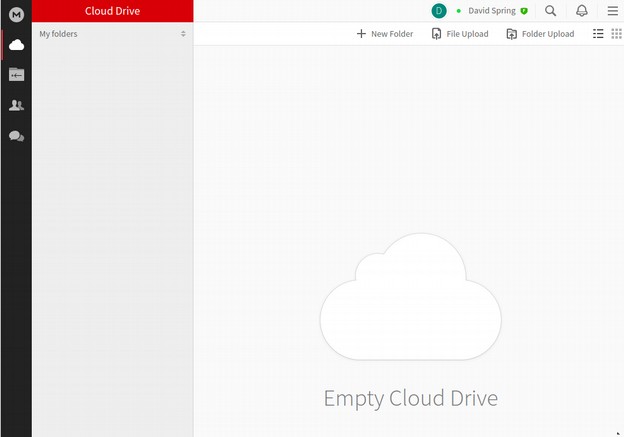
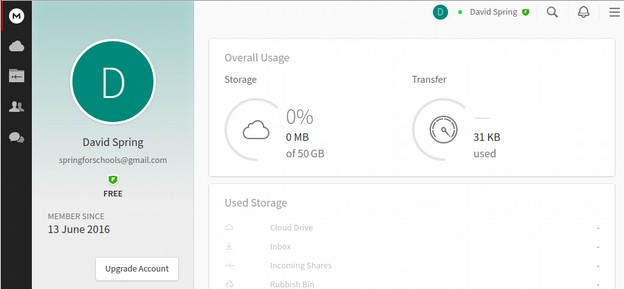
Here is the initial screen for your Cloud Drive file manager.
Click on the M in the upper left corner to reach the Mega dashboard:
Click on the Cloud to copy data to Mega

Click Folder Upload and load the Courses folder. The following screen will appear.
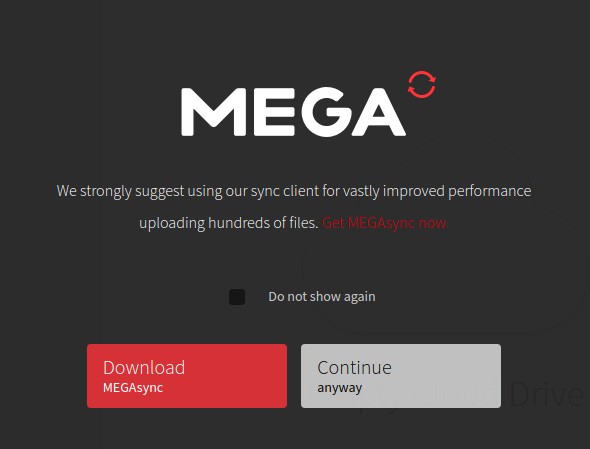
We will skip downloading Megasync for now and just load our Courses folder. Click Continue anyway. Once you are done loading your folder to the Mega Drive folder, which may take quite a while, we will next install the Mega Sync tool. The installation and usage of the Mega Sync tool is pretty easy.
Install MEGAsync in Linux
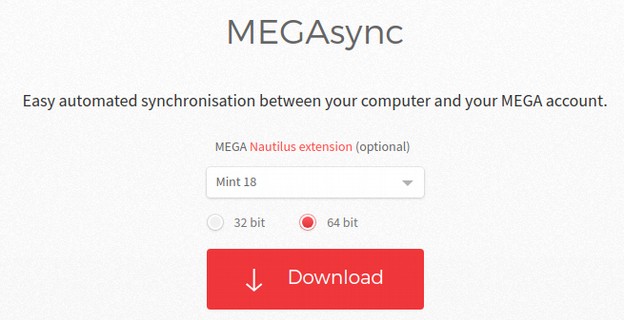
Get the MEGASync package from the following link. Just choose your Linux distribution (Linux Mint):
This will put a DEB install file in your Downloads folder. Next get the DEB install file for the Nemo extension from the following link:http://www.webupd8.org/2014/09/unofficial-megasync-nemo-extension.html
You will then have two DEB files in your Downloads folder.

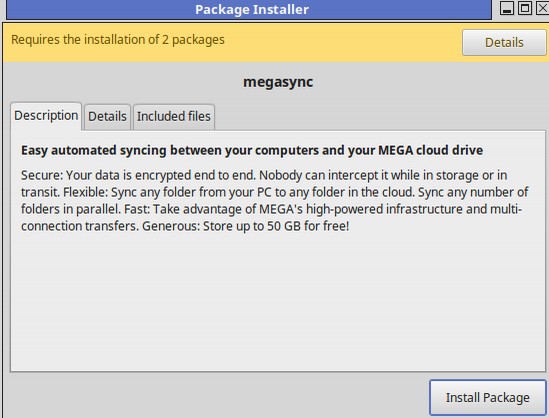
Transfer these two DEB files to where you want to store them. Then right click on the Megasync DEB file and click the top option which will be installed with the DEB package manager.
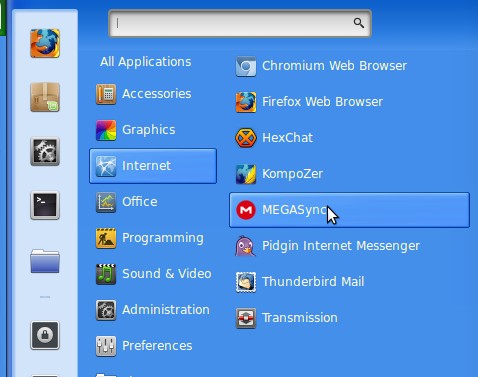
Once the install process is complete, you can launch MegaSync from your Mint Menu Applications by clicking on the MegaSync menu item in the Internet category.
This will bring up the Login window.
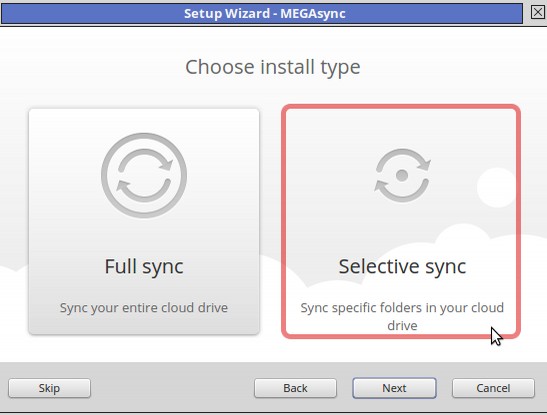
Click Login which will normally bring up your Mega Drive File Manager. But the first time, it will bring up the MegaSync Set Up Wizard. Choose Install type. We will only Sync some of our folders. So we will choose Selective Sync.
Click “Next.”
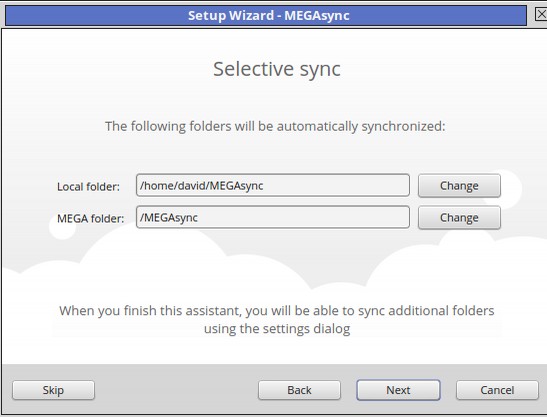
To choose a different folder to sync, click Change for the Local Folder and choose the folder in your File Manager you want to sync. The folder on the Mega end can be left alone or can be changed to match the folder name of the synced folder on our home computer.
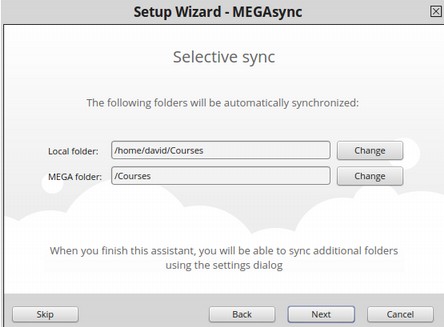
This will allow you to use a special sync folder in your Cloud Drive folder for our most active files and have other folders in your Cloud Drive that are not synced to your Home computer file manager for folders and files you rarely use. Click Next.
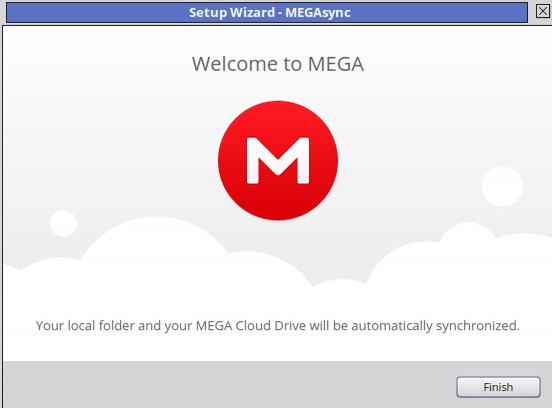
Click Finish. MegaSync is now listed in your Programs Menu. It is also listed in your side panel so you can simple click it to access your online cloud storage. Hover over the Red Circle M and you will see that it is scanning and syncing the two folders right now. When it is done syncing, the red icon will indicate “Up to Date” when you hover over it. Next right click on the Nemo Mega Extension to install it. This extension requires that MegaSync be installed first. Once you have installed the MegaSync Nemo Extension, restart your Nemo File Manager. Your Mega Synced folder will now have a red M circle to the left of the folder in your Nemo File Manager.
If you have more than one synced folder, there will be red M circles to the left of each of them.
Sharing Folders and Files with Others
While you can share your synced Home folder, this would require installing Samba which is not that secure. It is better to create a link to a synced or non-synced folder in your Cloud Drive. So go to your Cloud Drive and right click on the folder or file you want to share.
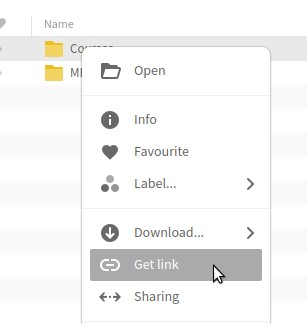
Then click Get Link. You can then copy this link and email it to others that you want to collaborate on the project with. To log out of your MegaDrive account, click on the Top Right Menu. Then click Log out.
Mega: Not just free secure back up and document sharing – but also free secure video conferencing!
Mega offers free secure video conferencing that allowing you to have secure user-controlled encryption of text, voice and video communication with your MEGA contacts. You can hold encrypted text, voice and video chat sessions with a single contact or text chats with a group of contacts through your browser. To get started with MEGAchat, invite your contacts to open a MEGA account, then use the 'Contacts' icon on the left menu to start chatting with them. You can use the contact verification feature to achieve the highest level of confidence that your contact is indeed the person you intended. Select a contact in the left pane on the Contacts tab, then click the Verify button (showing in the right pane) and confirm their Authenticity Credentials through a secure channel or by direct communication before clicking the Approve button to complete the verification. Just make sure you are using a modern, technologically compatible browser providing sufficient HTML5 support.
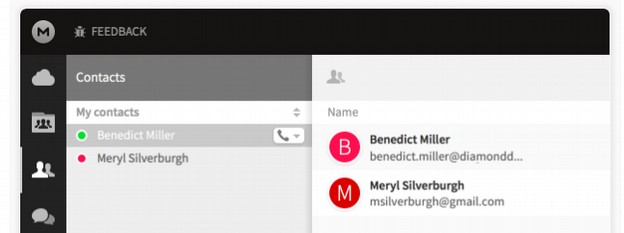
Go to your Contacts panel by clicking the Person icon on the left-hand side sidebar. Then click on the contact you want to talk to. Right-click and select Start Audio Call or Start Video Call from the context menu. When the browser notification pops up, allow MEGA to access your microphone and camera. Your call will commence.
Incoming calls: Click the green Audio Call or the blue Video Call button to answer your contact's call. Ensure both parties are online. Click your status button (top line, right) to change it from Red (Offline) to Green (Online). Make sure your system camera and audio are working (i.e. allowed in browser settings).
What’s Next?
We will next look at how to get rid of duplicate files.