LibreOffice is the most important program we will use to create our websites. Sadly, Manjaro Plasma does not comes with LibreOffice. To add LibreOffice, first make sure you have an active Ethernet connection. Then go to Applications, System, Add Remove Software. Then change the category to Productivity and scroll down to Libre Office Fresh and click the Download arrow. Then click Apply and enter your password. Check all of the optional dependencies and click Choose. Use the default for Java runtime and click Choose. Then click Choose again. Then click Apply. It will take about 30 minutes to download and install LibreOffice.
Create two new folders
Before we simplify Libre Office, we need to create a new folder specifically to hold images saved by Libre Writer. In our previous article, we installed the Nemo file manager and right clicked on the screen. Click Create New Folder. Then name the folder apps. Repeat to create a second folder called 0-my-images.
Simplify Libre Writer
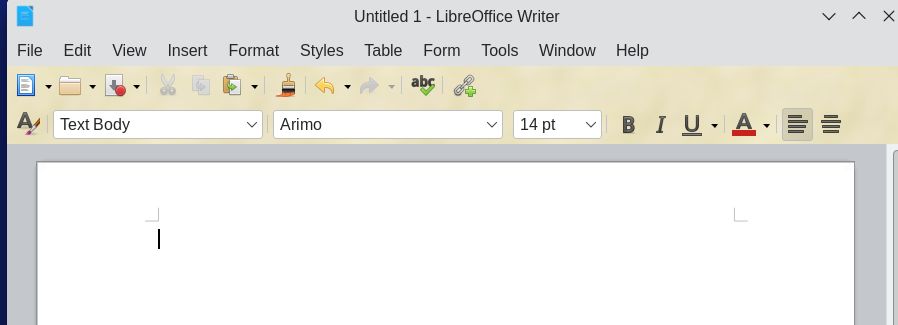
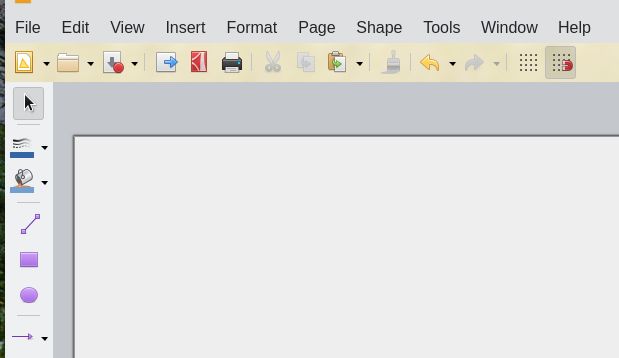
To open Libre Writer, click Applications, Office and right click on Writer to place the Writer icon on the bottom panel. Then click on the icon to open Writer. Here is the first extremely complex screen when opening Libre Writer:
Click View and uncheck the status bar, ruler and sidebar. Then click Tools, Customize, Toolbars, Standard to hide some of the icons. Then hide icons on the formatting tool bar.
Then click Tools, Options.
Click View and change the Icon style to Elementary. Then click Paths, Images and change the path to 0-my-images. Then click Templates and click Add. Then click Templates folder. Then click OK:
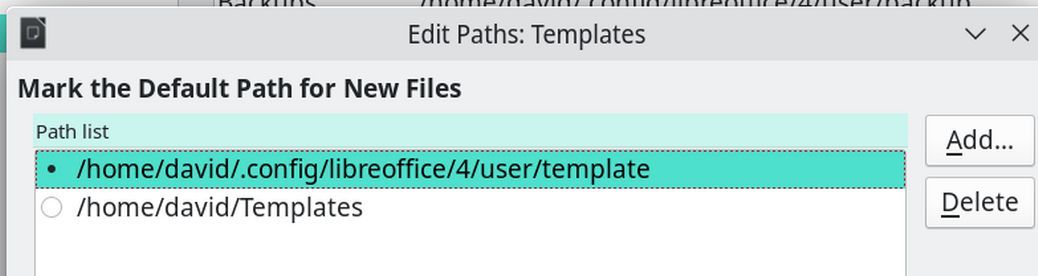
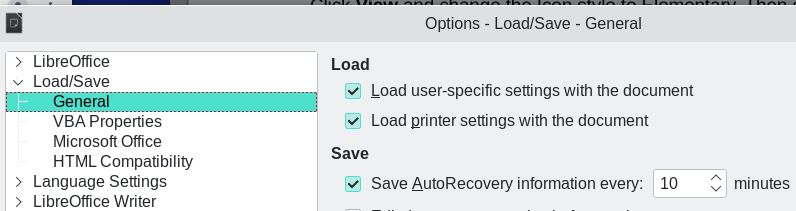
Then delete the default template path. Then click OK. Then click Personalization. Choose the light brown color. Then click Load/Save, General and check Save AutoRecover every 10 minutes.
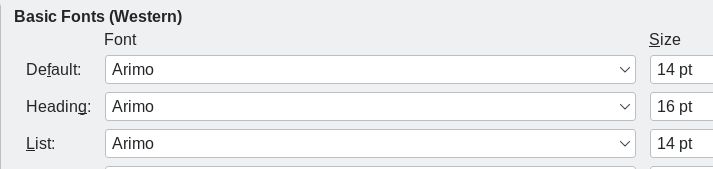
Then click Libre Office Writer, Formatting Aids and change Image anchor from character to Paragraph. Then click Basic Fonts and change the font from Noto Serif to Arimo and increase the font sizes:
Click Apply and OK to close the Options screen. Next, change the Paragraph style from Default to Text Body.
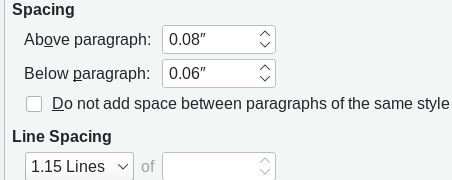
Then click the Styles icon (to the left of Text body) to modify the Text body style. Increase the Spacing to 0.08 above paragraph and 0.06 below paragraph.
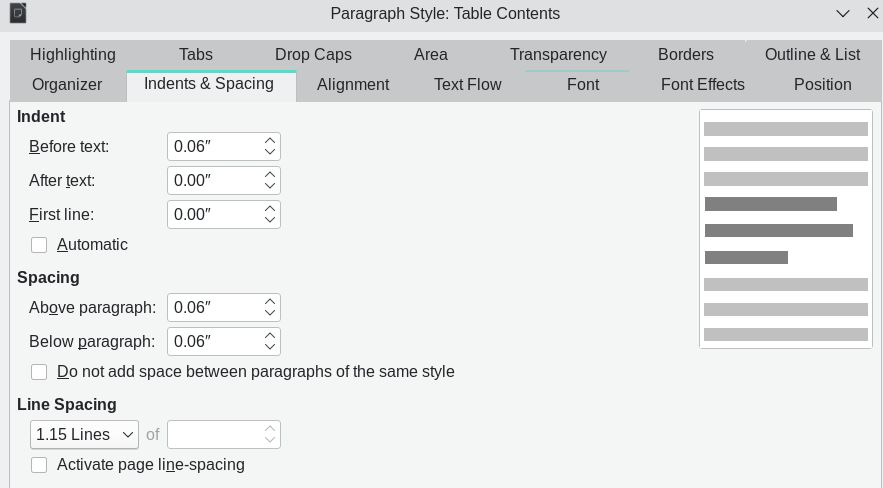
Click OK. Next, click Table Contents paragraph style (which is just above the Text Body Paragraph Style). Then right click and click Modify. Click the Font tab and change it to Arimo, Regular, 14pt. Then click the Indents and Spacing tab. Increase Before text, Above Paragraph and Below Paragraph to 0.06 and increase Line Spacing to 1.15:
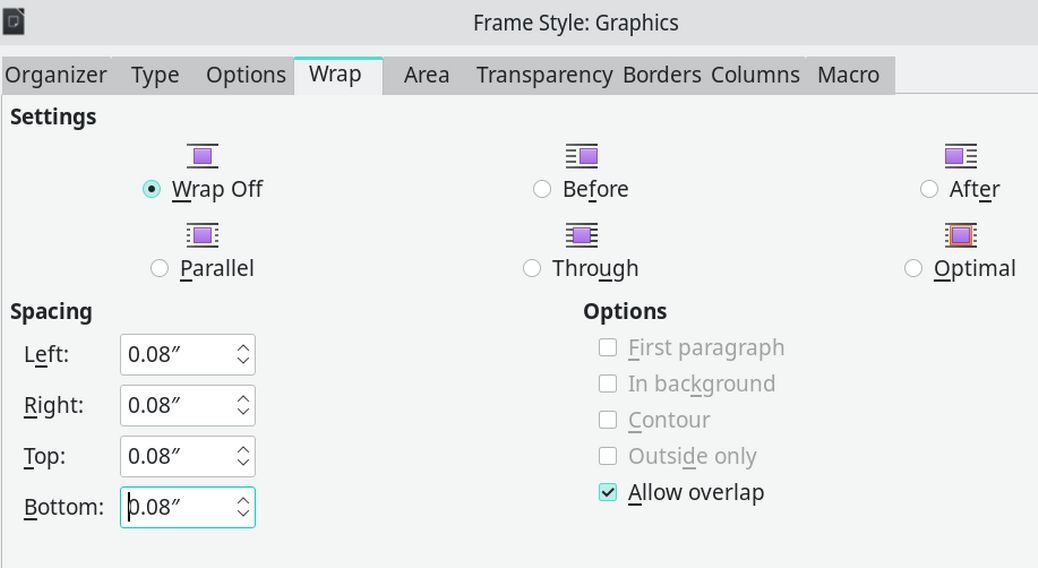
Then click Frame Styles and modify the default Graphics style. Click the Wrap tab and select Wrap Off. Then increase spacing around graphics to 0.08. Click OK.
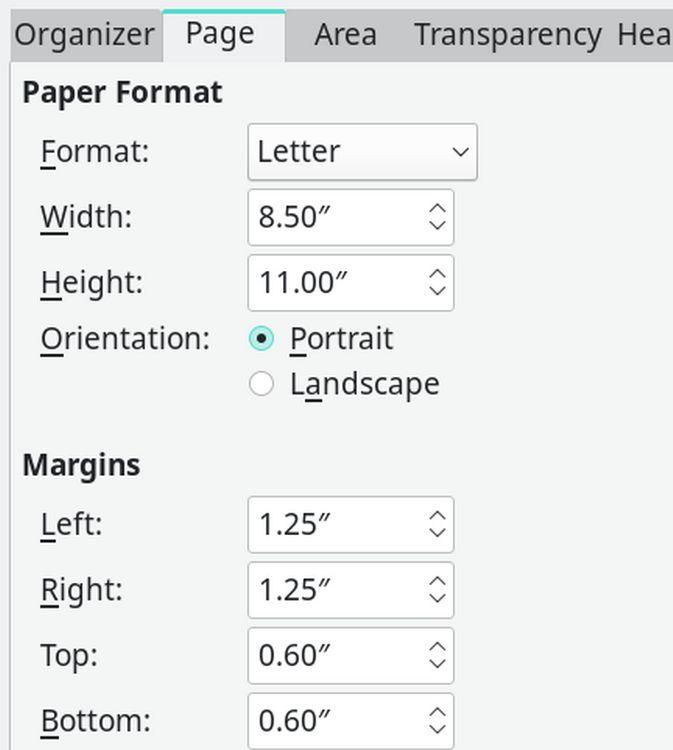
Then click on the Page style to modify the default page style to Format Letter, with Left and Right Margins set to 1.25 inches and Top and Bottom Margins set to 0.60 inches:
Then click OK. Then close the Formatting screen and hide the side panel by clicking View and then unchecking Sidebar.
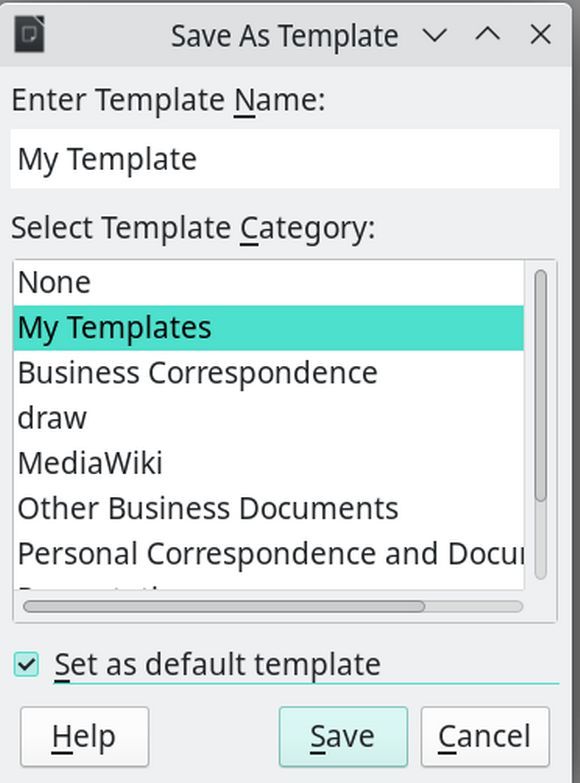
Then click File Templates, Save as Template.
Then close the blank document and open a new document. It should open as a Writer document controlled by your new Writer template.
Increase the Number of Recent Documents
By default, Writer only shows the 25 most recent documents in File, Recent Documents. To increase this number, open a Writer document and click Tools, Options, Advanced. In the right panel of the Options window in the bottom right, press the button called Open Expert Configuration. A new window will open and at the top is a search bar. Enter picklistsize and press enter.

The default value of the value box is 25. Click on it to bring up a popup and increase the number to 99. Then click OK, OK, Apply, OK.
Configure Libre Draw
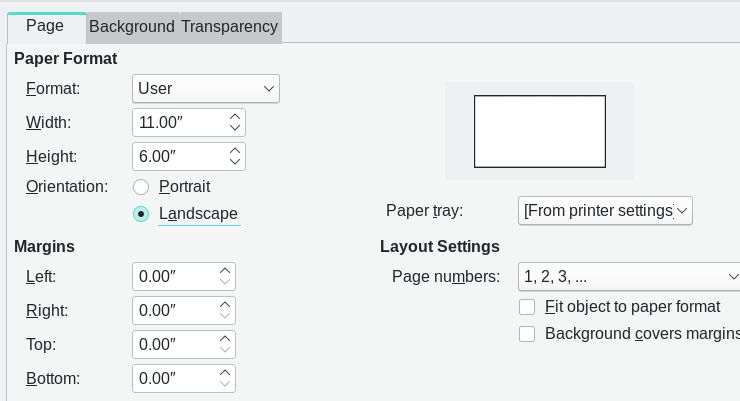
Just as we can set up a template for Libre Draw, we can also set up a default template for Libre Draw. The most common dimensions we will use for both Libre Draw and Libre Impress is 16 by 9 which is not only the dimension of most modern laptop screens but also the dimension of most wide screen videos. To set Libre Draw for 16 by 9, open a new Libre Draw Drawing. Then click Page, Page Properties. Change the Format to Screen 16:9 and the Orientation to Landscape. Then change the width to 16 inches and the height to 9 inches.
Click the Background tab. Click Color and click Pick. Change the Hex # to eeeeee (light gray). Then click OK. Then click OK again.
Create a Custom Background Color Palette
For both Libre Draw and Libre Impress, we often want to use a variety of very light background colors for our content boxes. Click on Format, Area to see the default color palette called standard.
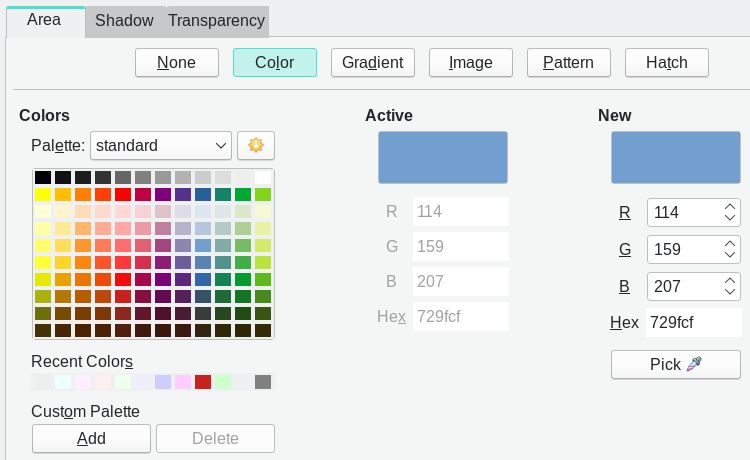
Click on the drop down arrow to the right of the word standard to see the other pallette options. Click Custom to see that there are no colors in this pallette. To add a color to the custom palette, click Pick and change the New Color to #eeeeff. Then click OK. Then click Add.
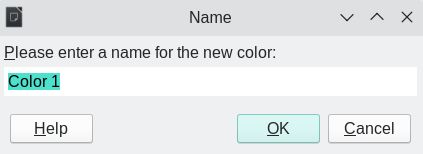
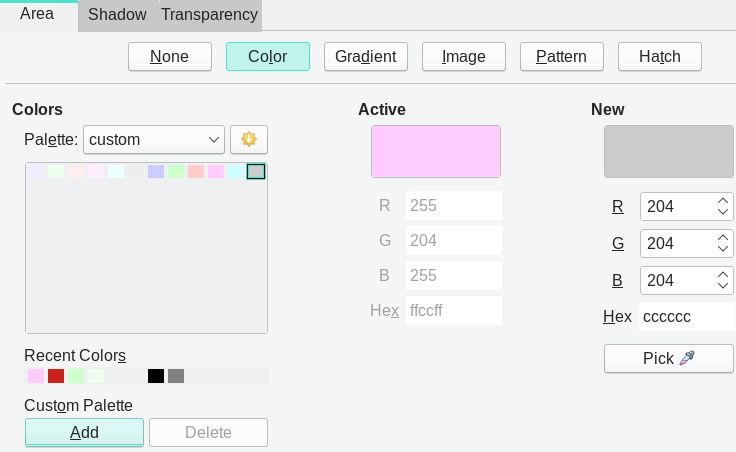
Change the name from Color 1 to Light Blue. Repeat to add Light Green (eeffee), light pink (ffeeee), light purple (ffeeff), light cyan (eeffff) and light gray (eeeeee). Then add medium colors replacing the ee values above with cc. For example, medium blue is ccffcc. Here is the result:
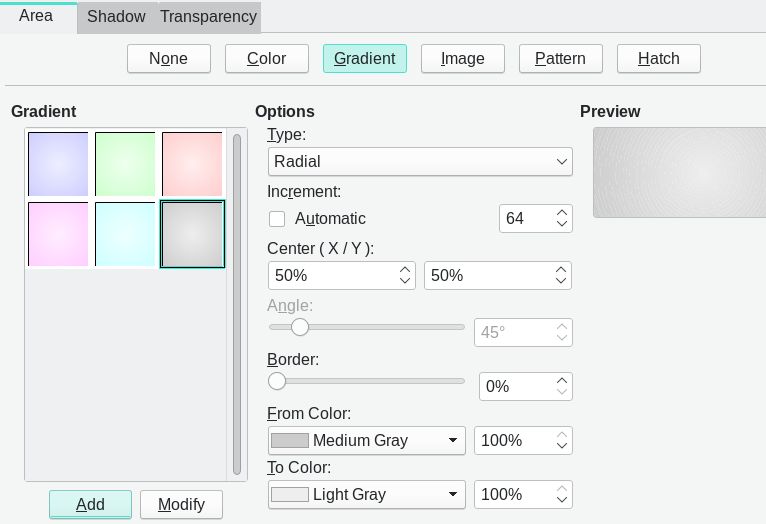
Next click on the Gradients tab. There are 15 default gradient color combinations. Right click on every gradient and click Delete. To create a new Gradient combination, select Type Radial. For From Color, select Medium Blue and To Color, select Light Blue:
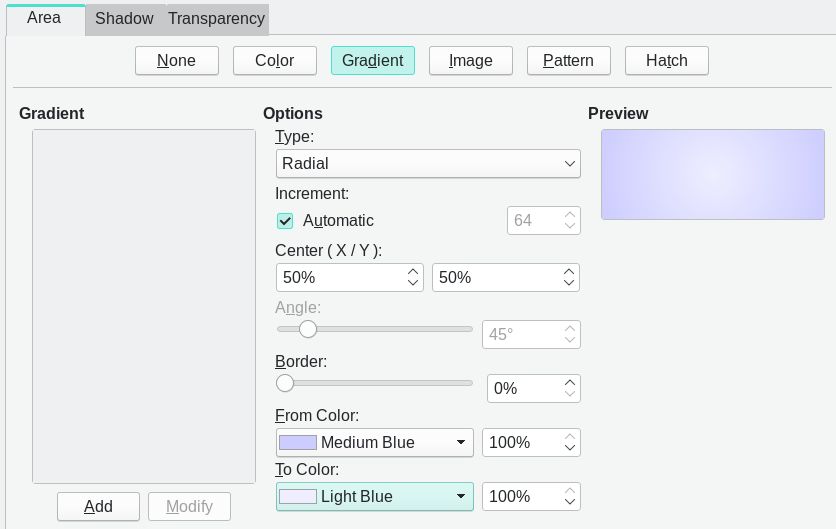
Click Add and name it Radial Blue. Repeat to create Radial Green, Radial Pink, Radial Purple, Radial Cyan and Radial Gray.
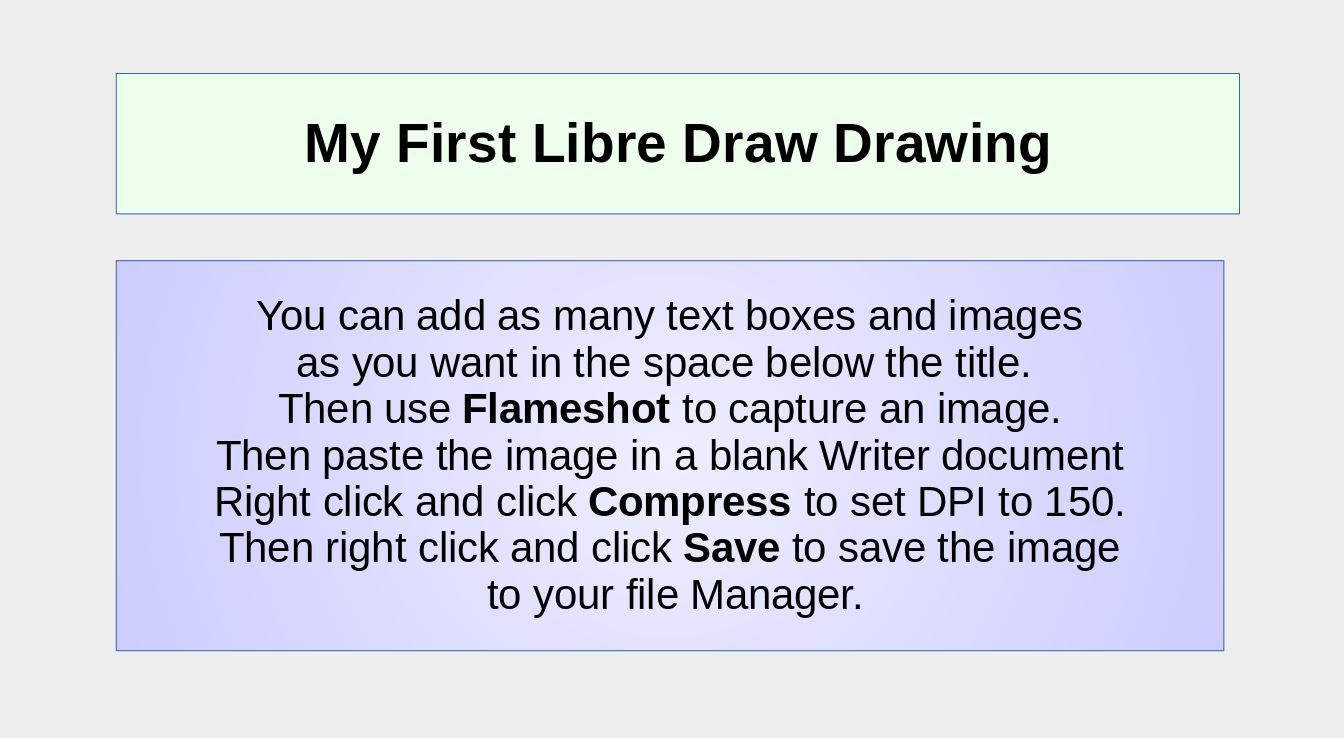
Then click OK. Then add a Light Green Title box by clicking on the square in the left side menu. Click Format Area to select a Light Green background. Type in some text, then right click on the text and click Character to make it Bold, 28. Then add a second box below it. Click Format, Area and make it a blue gradient. Add some text and set the size to 24. Then save the drawing:
Configure Libre Impress
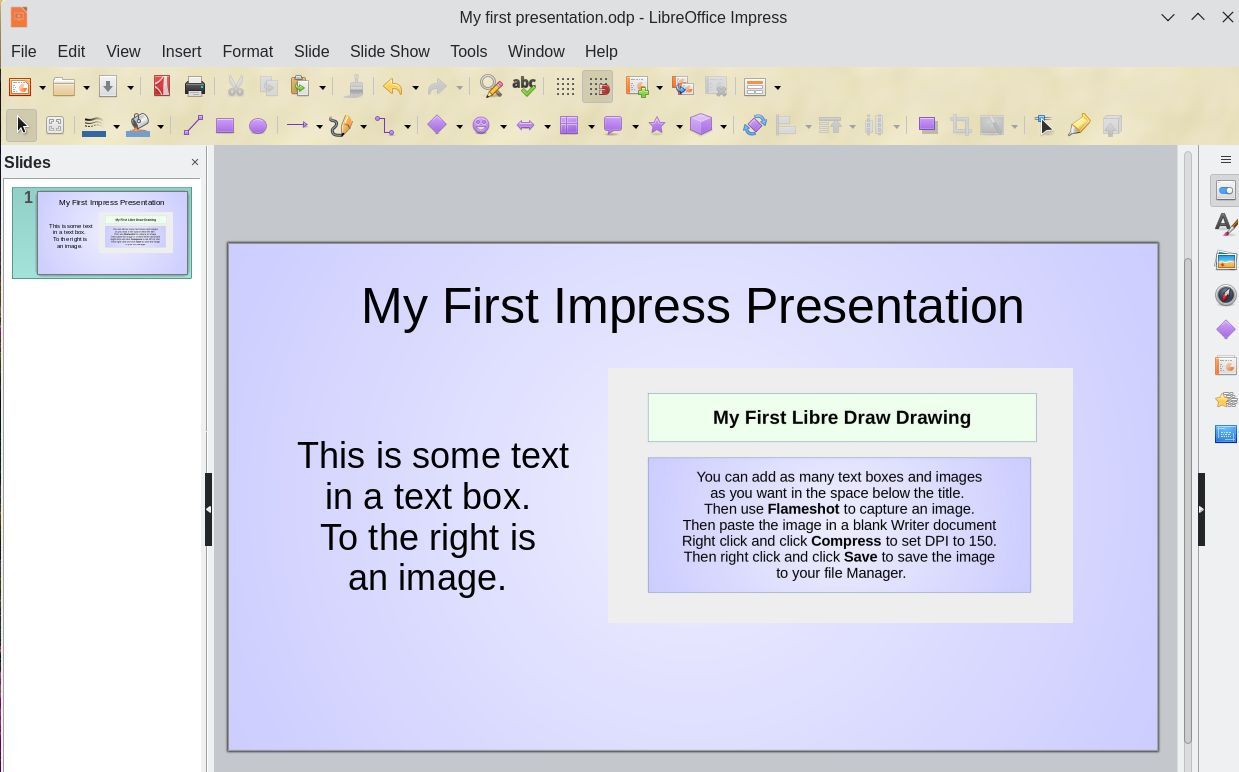
Here is how to create a new template for Libre Impress. Open a new blank Libre Impress Presentation. Close the Select a Template screen. Then click Slide, Slide Properties. Click the Slide tab and set the Format to Screen 16:9 and the Width to 11 inches and the Height to 8 inches.
Click the Background tab and change the Background to Blue Gradient. Click OK. Then close the Properties Panel. Add a title and some text and copy paste an image. Then save the presentation:
Add a New Custom Table Style
Tables are an important feature of many reports, lessons, books and websites. It can be very time consuming to manually format tables one by one. Ideally, we should be able to easily customize table styles or presets in order to have a consistent table appearance.
Sadly, the process for creating a new table style in Libre Office is not as simple as creating a new Page style, Paragraph style, Character style or Graphic Style. You cannot just right click on an existing table style and click NEW or MODIFY.
The process of creating a new table style is so hard that many people prefer to simply create a custom table and then keep a blank copy of that table in a separate Writer document. You can then copy and paste your custom table into your new documents. This option of creating your own custom tables is easy.
But what if you want to actually create your own custom Writer table styles so your custom styles will show up in the Libre Writer Insert Table screen and the Table Styles screen?
We will create two custom table styles to see how this is done.
Edit Libre Writer Template to Modify the Table Contents Paragraph Style
One of the most confusing aspects of creating a custom table style is that the Table Text formatting is controlled by the Table Content Paragraph style while the rest of the process for creating a custom table style is controlled by editing a Libre Calc document. If you have followed our previous articles, you may have already modified the Table Contents Paragraph Style. If not, edit the Writer template by opening any Writer document and then clicking on File, Edit Template. Then click on My Template. Then click Styles, Manage Styles. Click Table Contents. Then right click and click Modify. Click the Font tab and change it to Arimo, Regular, 14pt. Then click the Indents and Spacing tab. Increase Before text, Above Paragraph and Below Paragraph to 0.06 and increase Line Spacing to 1.15:

Then click OK. Then close the Styles Panel and click View, Uncheck Sidebar. Then click File Save. File Close.
Edit a Libre Calc Spreadsheet to Create a Custom Table Style
To define a new Table Style, you need to design a 4x4 Table in Libre Calc. To better understand this process, we will create two custom table styles with Libre Calc and import both into Libre Writer. The first custom table style will be the same as the default table style but will accept our Table Content Paragraph Stye changes. The second custom template will add alternating colorful rows.
To create our first custom table style, open up a new blank Libre Calc document with File, New, Spreadsheet. Save the Spreadsheet as Custom Default Table Style. The spreadsheet is already a table so there is no need to insert a table. However, the default Libre Calc table does not have any borders. We therefore need to click Edit, Select All. Then click Format Cells. Then click the Borders tab.
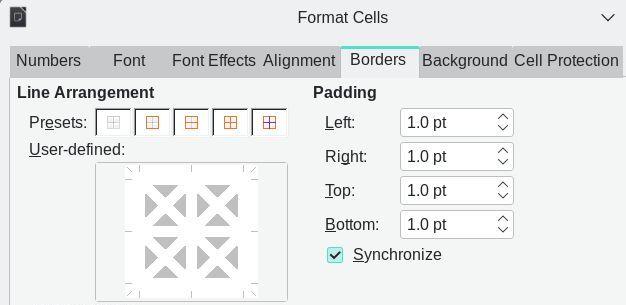
Under Line Arrangement, click on the fourth icon which will place visible borders on all outer and inner lines. Then click on the Font tab and change the font to Arimo 14 PT. Then click OK to close the Format Cells dialog. The click Edit, Select All again. Then click Format, AutoFormat:
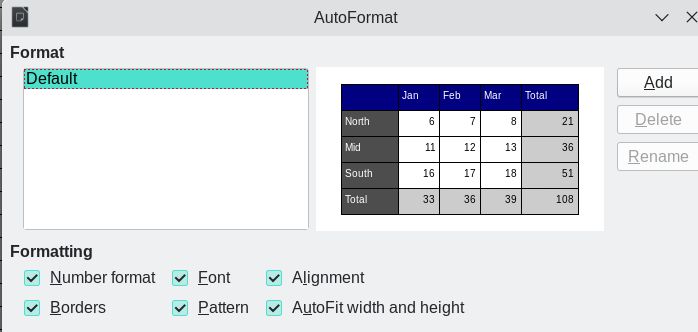
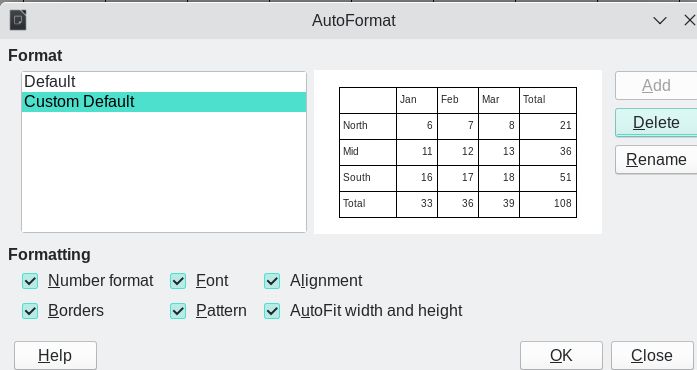
Click Add. Then name the new table style Custom Default. Then click OK.
Click OK. Then save and close the first Calc spreadsheet. To create our second custom table style, open up a second new blank Libre Calc spreadsheet with File, New, Spreadsheet. Save the Spreadsheet as Colorful Rows Custom Table Style. Click Edit, Select All and repeat the cell formatting steps above to add borders and change the font to Arimo 14. Then click OK to close the cell formatting dialog.
While you can format the rows and or columns any way you want the new Table Style to look, we will select rows one at a time and change their background colors with the top row being light gray and the next five rows alternating light blue with light green. Alternating the row background colors can greatly improve the readability of data in a complex table. Select a row. Then right click, click Format Cells. Click Background, Color and select the color for each row.
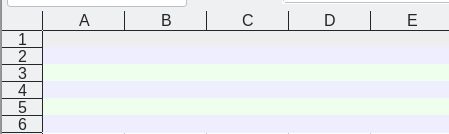
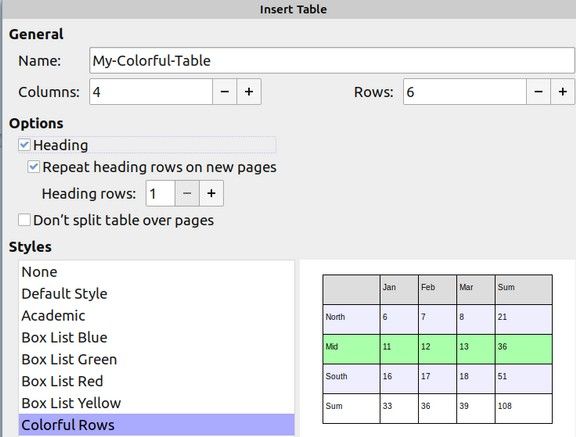
Then select only the six colorful rows. Then click Format, AutoFormat, Add. Call it Colorful Rows. Then click OK. Then click OK again. Then save and close the Calc spreadsheet. Finally, open a Writer document and click Table, Insert Table. Click Colorful Rows Style:
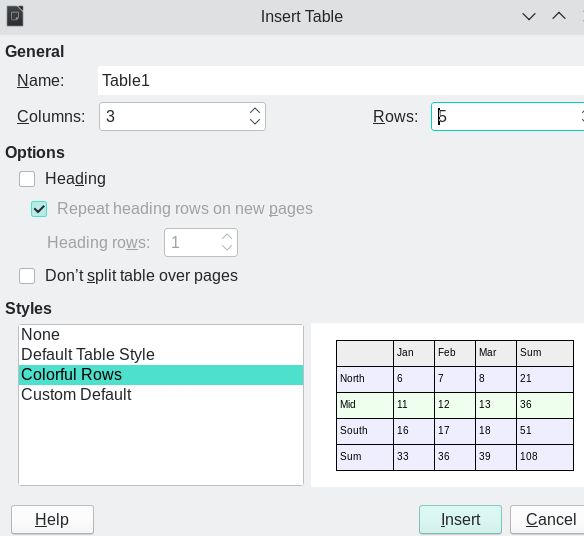
Then click Insert. Type in some text. Then delete the table and create a second table using the Custom Default Table Style.
Create a Chart with Libre Calc
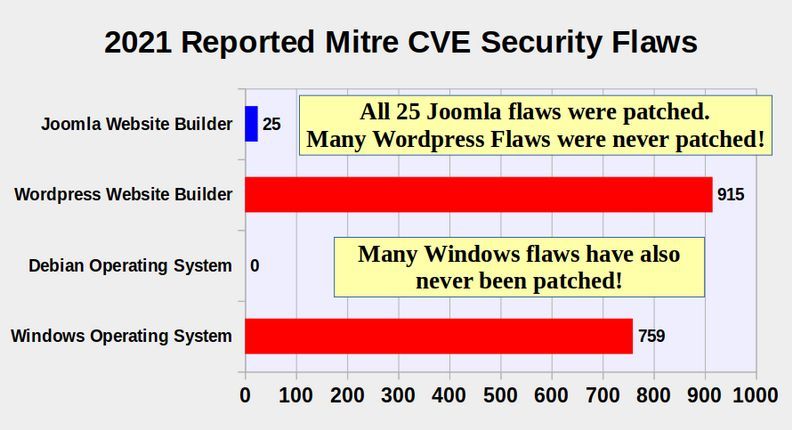
Begin with a Libre Writer document. Click Table, Insert Table and select the Custom Default Table Style. Then enter the security flaws for Wordpress and Windows compared to Joomla and Debian:
|
Program |
2021 Security Flaws |
|
Joomla Website Builder |
25 |
|
Wordpress Website Builder |
915 |
|
Debian Operating System |
0 |
|
Windows Operating System |
759 |
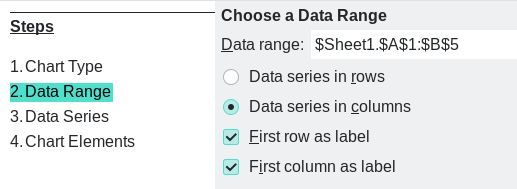
Then click File, New, Spreadsheet and save the spreadsheet as 2021 Security Flaws. Then copy paste the above table into the spreadsheet. Then select the five rows and two columns. Then click Insert:
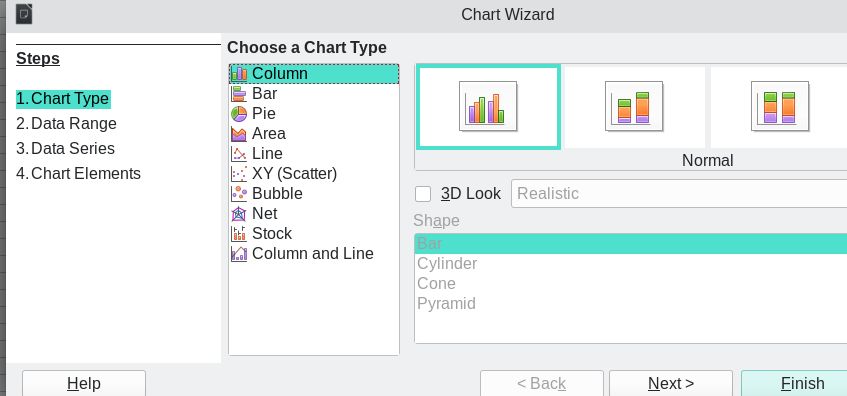
Change the Chart Type to Bar. Then click Next.
Click Next again. Click Next again. Uncheck Display Legend. Add a title and sub-title. Then click Finish:
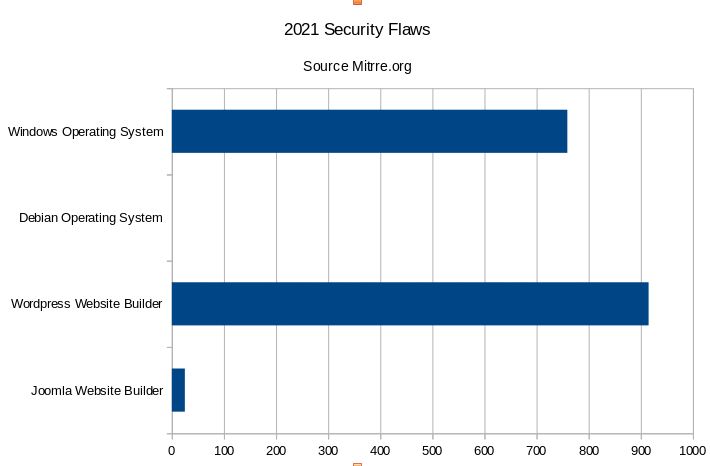
Here is what it looks like after formatting the area, title, bar colors and X and Y axis:
We have shown that Libre Office works just as well on a Pinebook Pro ARM laptop as it does on an X86 laptop.
What’s Next?
In our next article, we will review how to add more than two dozen additional important programs to our Pinebook Pro.