
The most impressive feature of Libre Office Impress is the ability to define a variety of custom background colors and effects. To open LibreOffice Impress from the Writer Menu, click on the Blue box below the Edit Menu item.
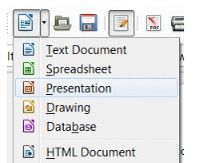
Then click on Presentation:
Change the Presentation to a 16x9 Ratio
Click Format Page. Then click on the Page Tab.
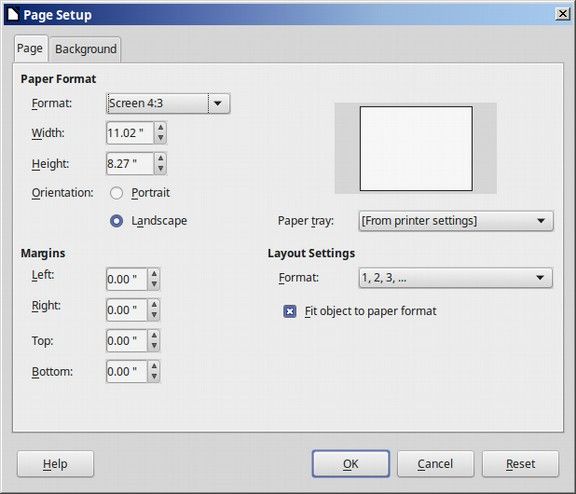
By default, the slide presentation is set for a 4 to 3 screen ratio. This ratio is generally for very old computers. If we want to create a slide presentation to match our Acer C910 screen, or to use in a full screen video presentation, we should change this to a 16 to 9 ratio. This is often called a Wide Screen Format. This 16 to 9 ratio is now the best ratio for a presentation that will be posted to Youtube. 16 x 9 is also a better ratio for posting a slideshow on the Home page of a website because screen height on the home page initial display is pretty limited. After selecting 16 x 9 ratio, the width will remain 11 inches but the height will be reduced to 6.2 inches. Click OK.
Access Default Background Designs
Click on Format, Slide Design and you will see that there is only one design to choose from.
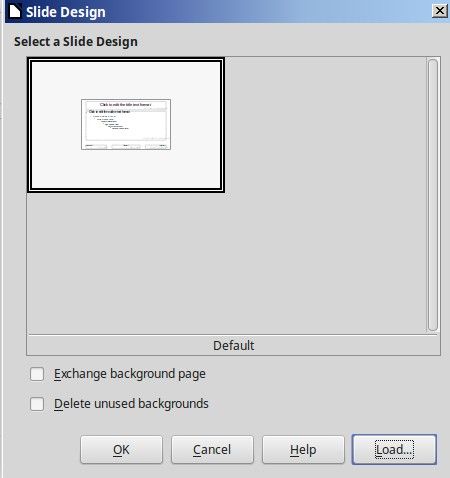
To get more, click on Load at the bottom of the screen.
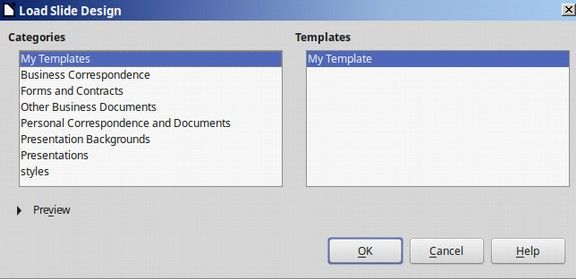
Click on Presentation Backgrounds to bring up a list of additional options:
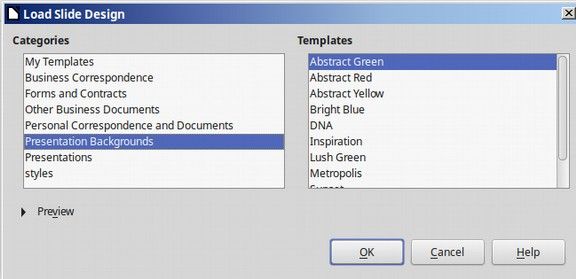
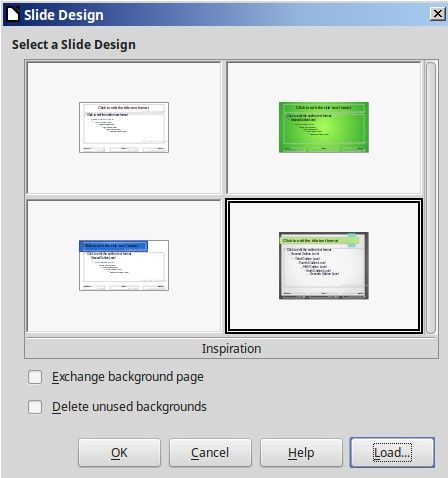
Click Preview to see what each option looks like. Then click on Abstract Green to load it as a Slide Design option. Then click Load again to load some more options. Now we have four options.
Format Slide Layout
Click Format, Slide Layout
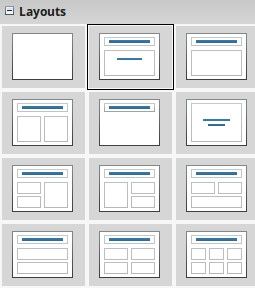
There are 12 different layout options to choose from.
Change the Presentation Background Area Color
Click Format, Area. Then click on the Colors Tab:
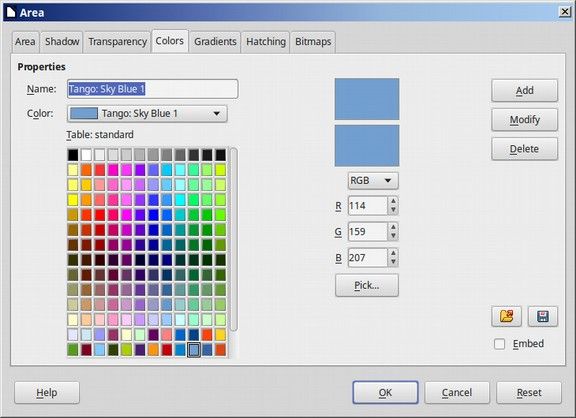
By default, the color selection table is set for a table called Standard. However, there are many other Color Selection Tables we can use. Click on the folder icon in the lower right corner to bring up the complete list. Next click on the Gradient Tab:
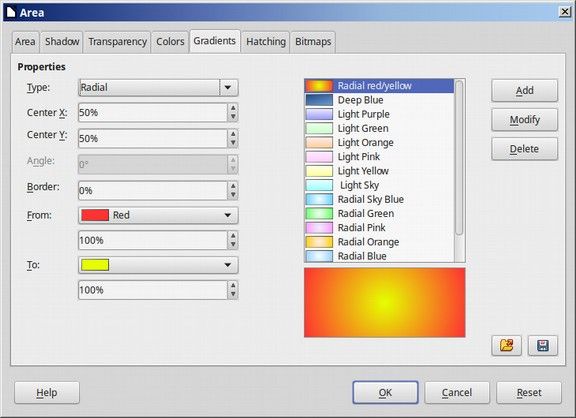
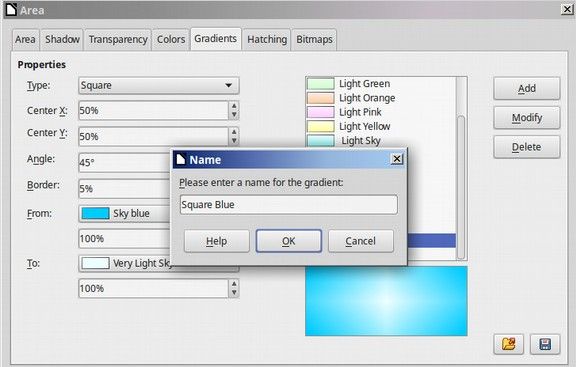
This brings up the Gradients options that we created with Libre Draw in a previous article. We will create some new backgrounds called Square. Change the Type to Square, the angle to 45 degrees and the border to 5 percent.
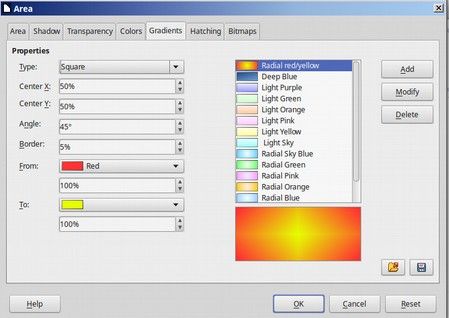
Then click Add and name it Square Red. Then click OK. Then change the From color to Sky Blue and the To color to Very Light Sky Blue. Then click Add and name it Square Blue.
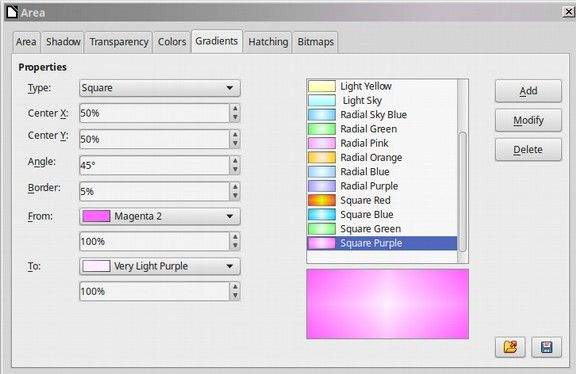
Repeat to create Square Green and Square Purple.
Click on the Save button in the lower right corner. Change the name to spring_custom.
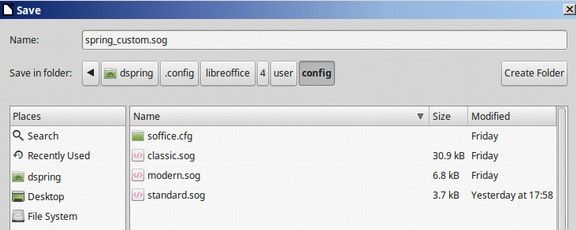
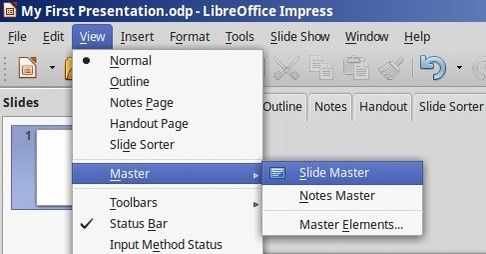
This will allow us to transfer this file to other Linux Mint computers without having to make it all over again. Then click OK. Now that we have created the background color option we want, we are ready to change the background of the slides. To change the background of a single slide, select View Normal. To change the background of all of the slides, select View, then Master, then Slide Master:
Once the master slide has been selected, click Format, then Page, then click on the Background tab. Use the drop down arrow to select Gradient. Then select the Square Blue background we created above. Then click OK:
Add a Title, Image and Text box to this slide.

This concludes our chapter on Libre Office tools. In the next chapter, we will look at additional tools which you can use to with Linux Mint.